
Mender Add-ons: Remote Troubleshooting Devices in the Field
(This article was written by open source software enthusiast and Konsulko Group intern Atanas Bunchev, working with Konsulko Senior Engineer Leon Anavi.)
Konsulko Group often works with Mender.io to provide secure, risk tolerant and efficient Over-The-Air updates for any software on an embedded device. This includes both solutions for robust system updates as well as updates of single applications. Mender is compatible with any Linux based OS, including popular build systems such as Yocto Project/OpenEmbedded, Buildroot and OpenWrt.
Aside from OTA updates Mender also offers several add-ons. These are optional extensions that provide functionality for use cases beyond the core OTA updates features.
One such use case is remote troubleshooting. In practice deployed devices in the field are often hard to reach or retrieve. Troubleshooting individual devices becomes resource inefficient and in some cases they have to be replaced even when it’s just a small software or configuration issue. Our experience has shown in these situations Mender’s Add-ons have proven to be extremely useful.
This article provides as an example, the exact steps how to integrate Mender with The Yocto Project and OpenEmbedded for SolidRun CuBox-I and HummingBoard as well as a demonstration of the Mender Troubleshooting package, more specifically the File Transfer and Remote Terminal Add-ons. With the File Transfer add-on files can be downloaded and uploaded to any accepted device. Remote Terminal add-on allows remote interactive command execution from the Mender UI.
These add-ons are very valuable for system administration and mantainance of Internet of Things or fleets of connected industrial devices. For an example, we will troubleshoot an embedded Linux device remotely with systemd using Mender add-ons. We will upload tools to gather system boot-up performance statistics, run them on the device thanks to the Remote Terminal and download logs for further debugging.
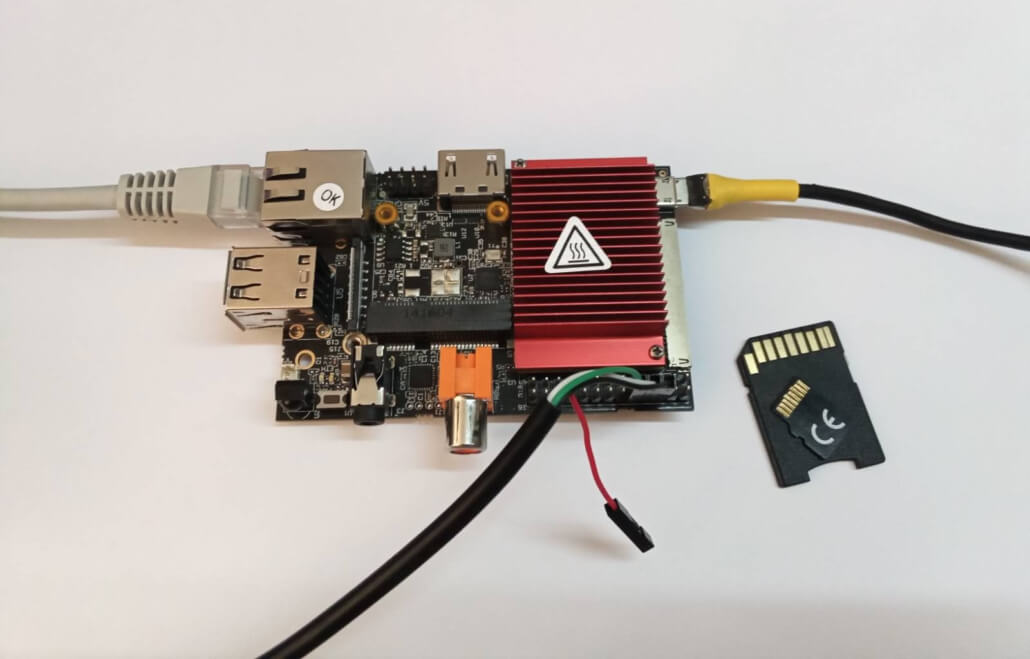
Any Mender enabled device is suitable for this demonstration. Recently the Konsulko Senior Engineer Leon Anavi ported Mender to SolidRun CuBox-I and HummingBoard with NXP i.MX6 SoC so our current setup is based on this hardware platform and Yocto LTS release Kirkstone. Earlier we also ported RAUC, an alternative free and open source OTA update platform to the same hardware. If you are interested in software updates, please contact us to discuss your own embedded product needs in details. The hardware used in this example is:
- HummingBoard Pro board
- 32GB microSD card
- Generic RJ45 network cable with Internet connection
- Optionally UART to USB adapter for debugging the setup section
Building a Linux Distribution with Yocto/OpenEmbedded
The Mender Community provides a set of examples for integration with various hardware platforms using Yocto/OpenEmbedded in the meta-mender-community repository. Sub-layer meta-mender-nxp in this repository contains the integration for Cubox-I/HummingBoard.
The meta-mender-nxp layer uses Google Repo to provide easy and simple setup and build process for the examples:
$ mkdir mender-nxp && cd mender-nxp
$ repo init -u https://github.com/mendersoftware/meta-mender-community \
            -m meta-mender-nxp/scripts/manifest-nxp.xml \
            -b kirkstone
$ repo sync
$ source setup-environment nxp
Board configuration
To configure the build system we have to append to conf/local.conf inside the build directory.
First we are going to set the build target machine:
MACHINE = "cubox-i"Then we have to accept the end user agreement required by the BSP layer:
ACCEPT_FSL_EULA = "1"Note: Usually to enable Mender’s Troubleshooting features we have to add mender-connect to IMAGE_INSTALL. In our case this is already added by the meta-mender-demo layer.
Mender configuration
We have to provide our device with MENDER_SERVER_URL and MENDER_TENANT_TOKEN.
For that reason we have to register at https://mender.io/.
Mender provides a free demo profile with limitation of 1 year and up to 10 devices which can be used to experiment with all of Mender’s features.
In fact, when sourcing the setup-environment script we get most of the mender-specific configuration appended to local.conf. This includes a description of how to get our tenant token:
# Build for Hosted Mender
#
# To get your tenant token:
#    - log in to https://hosted.mender.io
#    - click your email at the top right and then "My organization"
#    - press the "COPY TO CLIPBOARD"
#    - assign content of clipboard to MENDER_TENANT_TOKEN
#
#MENDER_SERVER_URL = "https://hosted.mender.io"
#MENDER_TENANT_TOKEN = ""
Note: If using the European server one has to set MENDER_SERVER_URL = "https://eu.hosted.mender.io"
Once we assign our tenant token and remove the # in front of MENDER_SERVER_URL and MENDER_TENANT_TOKEN we’re ready to build our system.
Building and flashing the system image to a microSD card
Build an example image with Yocto:
$ bitbake core-image-baseBuilding an image from scratch is a long process involving a lot of tasks. Please patiently wait until bitbake completes all tasks.
Once the build is complete flash the image to the microSD card (replace /dev/sdX with the proper device path) and boot it on the HummingBoard:
$ bmaptool copy tmp/deploy/images/cubox-i/core-image-base-cubox-i.sdimg.bz2 /dev/sdX
$ sync
$ eject /dev/sdX
Connecting to Mender
Once the board finishes booting it will poll the Mender server. By design the connection has to be established from the board to the server. Mender does not open any ports on the board to provide better security therefore the device has to initiate the connection.
When the connection is established the Mender control panel will indicate one pending device.
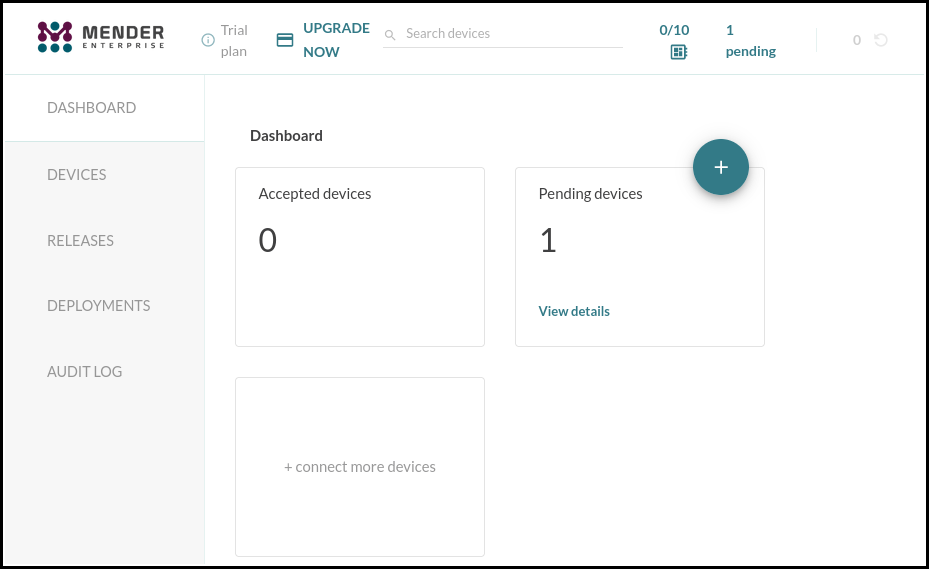
To accept the request click on View details under Pending devices.
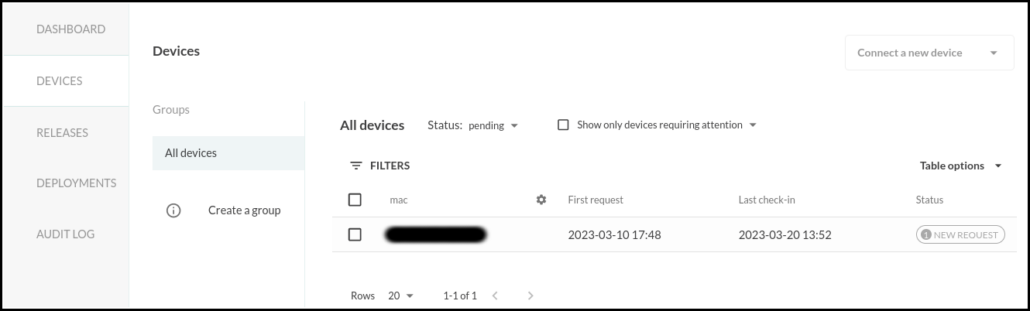
Select the new device and press accept in the Authorization request section.
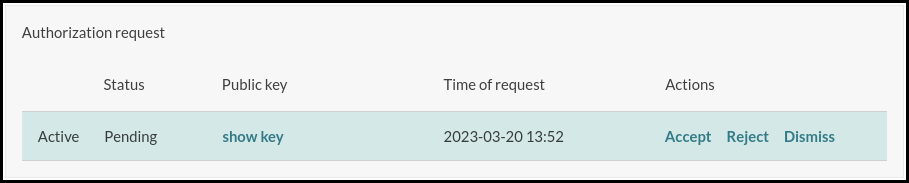
Once the connection is accepted head over to the Troubleshooting tab in the Device information section. Here you can launch a remote terminal and transfer files.
The next part of the article will demonstrate preparing, uploading and using systemd-analyze to fetch data about the boot process.
Preparing troubleshooting software
To compile systemd-analyze we have to add it to our image in conf/local.conf:
IMAGE_INSTALL:append = " systemd-analyze"Rebuild systemd to get the systemd-analyze binary:
$ bitbake systemd -c compileWhen using the do_compile command Yocto/OpenEmbedded will preserve the compiled binaries.Find the systemd-analyze binary and libsystemd-shared-<version>.so shared library:
$ find tmp/work -name "systemd-analyze"
$ find tmp/work -name "libsystemd-shared*.so"
Note: As of the time of writing of this article these files should reside in locations similar to ./tmp/work/cortexa9t2hf-neon-poky-linux-gnueabi/systemd/1_250.5-r0/build/systemd-analyze and ./tmp/work/cortexa9t2hf-neon-poky-linux-gnueabi/systemd/1_250.5-r0/build/src/shared/libsystemd-shared-250.so. These paths depend on the exact version of systemd as well as the build configuration and may not be correct in your case.
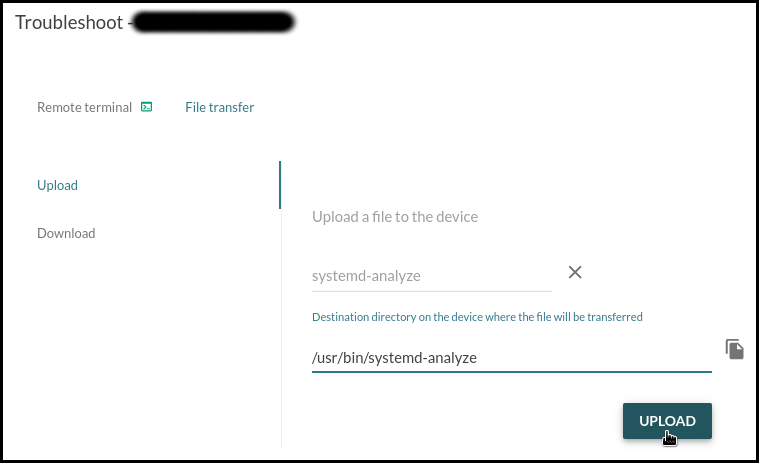
Uploading the troubleshooting software
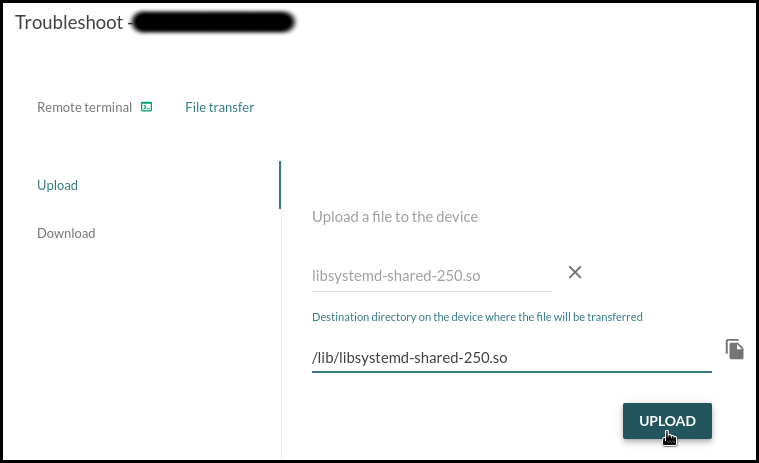
Upload these files to the board using Mender’s File Transfer utility:
systemd-analyzeinto/usr/bin/libsystemd-shared-<version>.sointo/usr/lib/
Fetching service initialization logs
Once the troubleshooting software is uploaded we can use the Remote Terminal to execute it.
Permit execution of the systemd-analyze binary:
# chmod +x /usr/bin/systemd-analyzeCheck the time it took for the system to initialize:
# systemd-analyzeExport a graphic of all enabled services and the time they took to initialize:
# systemd-analyze plot > init.svg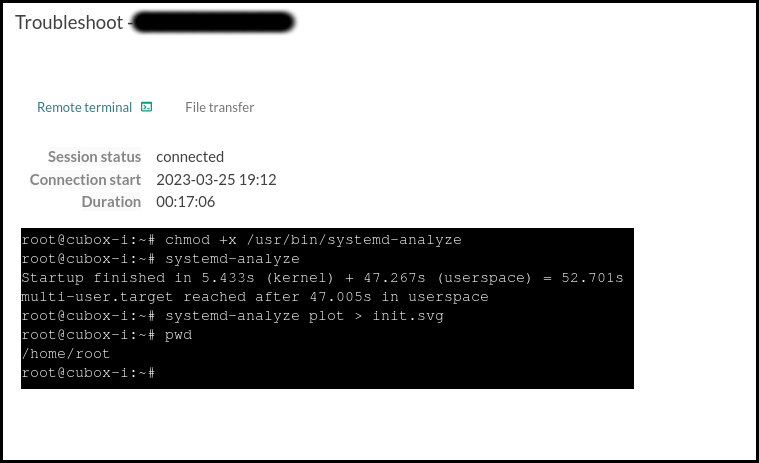
Download init.svg:
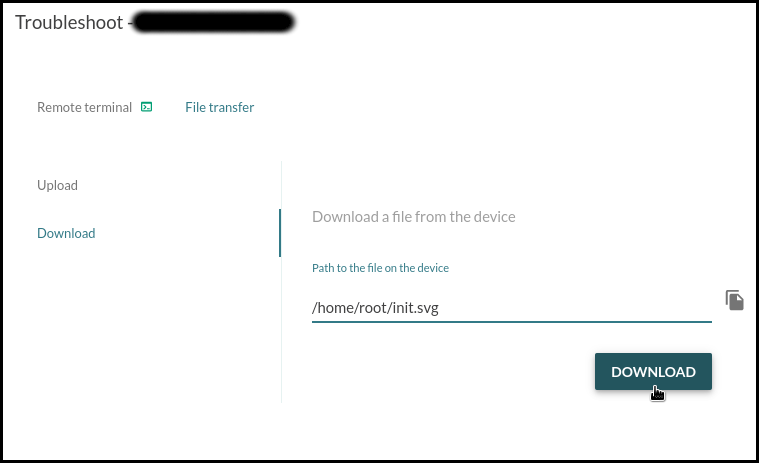
This graphic shows that the device needs around a minute to reach multi-user.target. The longest task is the resizing of the /data partition that runs on first boot and the second longest is the filesystem check for mmcblk1p1 that runs every time the system boots.

Here is another graphic generated after a reboot:

This article demonstrates how to use Mender’s Remote terminal and File Transfer troubleshooting utilities to upload and execute the systemd-analyze binary to profile the initialization process of systemd services. These troubleshooting utilities can be used for variety of different tasks. After debugging a single device and finding an appropriate fix, Mender is capable of performing an A/B or delta software update to all devices or specific group of devices in the field.
Since the earliest days of the OpenEmbedded build framework and the Yocto Project, Konsulko engineers have been contributing to the community and helping customers build commercial products with these technologies. We have experience with RAUC, Mender and other open source solutions for software updates. Please contact us to discuss your own embedded product needs.