Mender Add-ons: Remote Troubleshooting Devices in the Field

(This article was written by open source software enthusiast and Konsulko Group intern Atanas Bunchev, working with Konsulko Senior Engineer Leon Anavi.)

Konsulko Group often works with Mender.io to provide secure, risk tolerant and efficient Over-The-Air updates for any software on an embedded device. This includes both solutions for robust system updates as well as updates of single applications. Mender is compatible with any Linux based OS, including popular build systems such as Yocto Project/OpenEmbedded, Buildroot and OpenWrt.

Aside from OTA updates Mender also offers several add-ons. These are optional extensions that provide functionality for use cases beyond the core OTA updates features.

One such use case is remote troubleshooting. In practice deployed devices in the field are often hard to reach or retrieve. Troubleshooting individual devices becomes resource inefficient and in some cases they have to be replaced even when it’s just a small software or configuration issue. Our experience has shown in these situations Mender’s Add-ons have proven to be extremely useful.

This article provides as an example, the exact steps how to integrate Mender with The Yocto Project and OpenEmbedded for SolidRun CuBox-I and HummingBoard as well as a demonstration of the Mender Troubleshooting package, more specifically the File Transfer and Remote Terminal Add-ons. With the File Transfer add-on files can be downloaded and uploaded to any accepted device. Remote Terminal add-on allows remote interactive command execution from the Mender UI.

These add-ons are very valuable for system administration and mantainance of Internet of Things or fleets of connected industrial devices. For an example, we will troubleshoot an embedded Linux device remotely with systemd using Mender add-ons. We will upload tools to gather system boot-up performance statistics, run them on the device thanks to the Remote Terminal and download logs for further debugging.

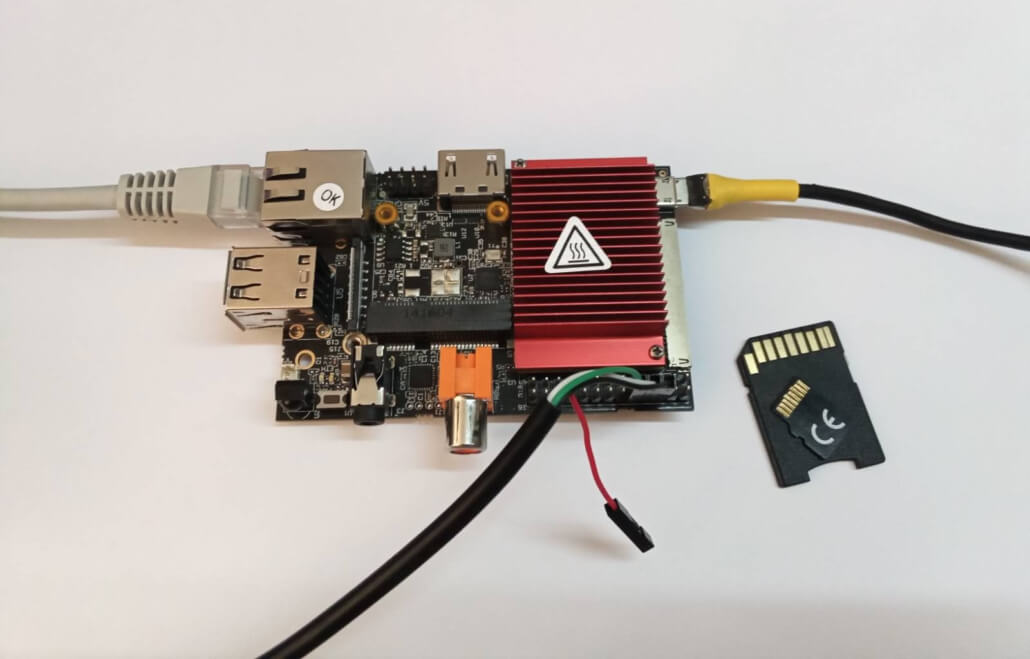
Any Mender enabled device is suitable for this demonstration. Recently the Konsulko Senior Engineer Leon Anavi ported Mender to SolidRun CuBox-I and HummingBoard with NXP i.MX6 SoC so our current setup is based on this hardware platform and Yocto LTS release Kirkstone. Earlier we also ported RAUC, an alternative free and open source OTA update platform to the same hardware. If you are interested in software updates, please contact us to discuss your own embedded product needs in details. The hardware used in this example is:

  • HummingBoard Pro board
  • 32GB microSD card
  • Generic RJ45 network cable with Internet connection
  • Optionally UART to USB adapter for debugging the setup section

Building a Linux Distribution with Yocto/OpenEmbedded

The Mender Community provides a set of examples for integration with various hardware platforms using Yocto/OpenEmbedded in the meta-mender-community repository. Sub-layer meta-mender-nxp in this repository contains the integration for Cubox-I/HummingBoard.

The meta-mender-nxp layer uses Google Repo to provide easy and simple setup and build process for the examples:

$ mkdir mender-nxp && cd mender-nxp
$ repo init -u https://github.com/mendersoftware/meta-mender-community \
            -m meta-mender-nxp/scripts/manifest-nxp.xml \
            -b kirkstone
$ repo sync
$ source setup-environment nxp

Board configuration

To configure the build system we have to append to conf/local.conf inside the build directory.

First we are going to set the build target machine:

MACHINE = "cubox-i"

Then we have to accept the end user agreement required by the BSP layer:

ACCEPT_FSL_EULA = "1"

Note: Usually to enable Mender’s Troubleshooting features we have to add mender-connect to IMAGE_INSTALL. In our case this is already added by the meta-mender-demo layer.

Mender configuration

We have to provide our device with MENDER_SERVER_URL and MENDER_TENANT_TOKEN.
For that reason we have to register at https://mender.io/.

Mender provides a free demo profile with limitation of 1 year and up to 10 devices which can be used to experiment with all of Mender’s features.

In fact, when sourcing the setup-environment script we get most of the mender-specific configuration appended to local.conf. This includes a description of how to get our tenant token:

# Build for Hosted Mender
#
# To get your tenant token:
#    - log in to https://hosted.mender.io
#    - click your email at the top right and then "My organization"
#    - press the "COPY TO CLIPBOARD"
#    - assign content of clipboard to MENDER_TENANT_TOKEN
#
#MENDER_SERVER_URL = "https://hosted.mender.io"
#MENDER_TENANT_TOKEN = ""

Note: If using the European server one has to set MENDER_SERVER_URL = "https://eu.hosted.mender.io"

Once we assign our tenant token and remove the # in front of MENDER_SERVER_URL and MENDER_TENANT_TOKEN we’re ready to build our system.

Building and flashing the system image to a microSD card

Build an example image with Yocto:

$ bitbake core-image-base

Building an image from scratch is a long process involving a lot of tasks. Please patiently wait until bitbake completes all tasks.

Once the build is complete flash the image to the microSD card (replace /dev/sdX with the proper device path) and boot it on the HummingBoard:

$ bmaptool copy tmp/deploy/images/cubox-i/core-image-base-cubox-i.sdimg.bz2 /dev/sdX
$ sync
$ eject /dev/sdX

Connecting to Mender

Once the board finishes booting it will poll the Mender server. By design the connection has to be established from the board to the server. Mender does not open any ports on the board to provide better security therefore the device has to initiate the connection.

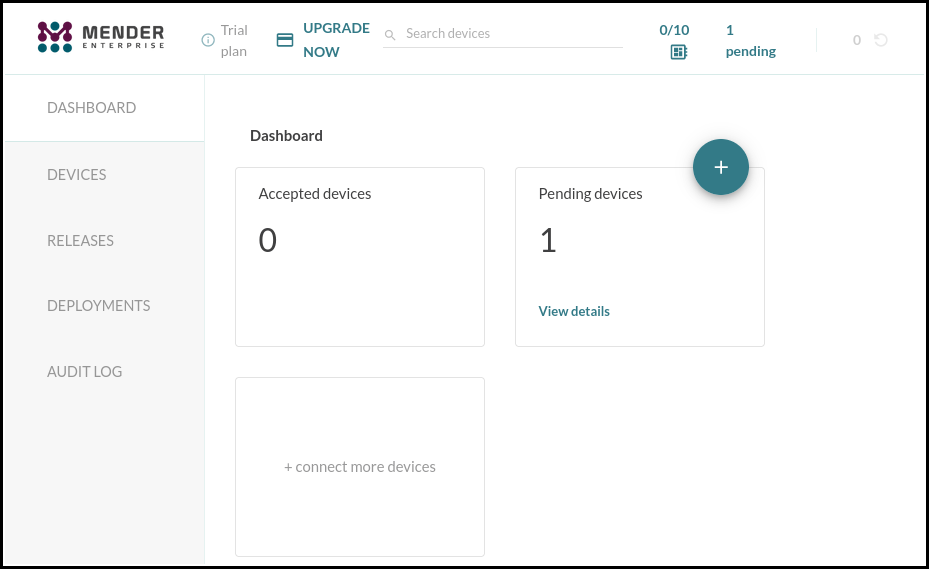
When the connection is established the Mender control panel will indicate one pending device.

To accept the request click on View details under Pending devices.

Select the new device and press accept in the Authorization request section.

Once the connection is accepted head over to the Troubleshooting tab in the Device information section. Here you can launch a remote terminal and transfer files.

The next part of the article will demonstrate preparing, uploading and using systemd-analyze to fetch data about the boot process.

Preparing troubleshooting software

To compile systemd-analyze we have to add it to our image in conf/local.conf:

IMAGE_INSTALL:append = " systemd-analyze"

Rebuild systemd to get the systemd-analyze binary:

$ bitbake systemd -c compile
When using the do_compile command Yocto/OpenEmbedded will preserve the compiled binaries.

Find the systemd-analyze binary and libsystemd-shared-<version>.so shared library:

$ find tmp/work -name "systemd-analyze"
$ find tmp/work -name "libsystemd-shared*.so"

Note: As of the time of writing of this article these files should reside in locations similar to ./tmp/work/cortexa9t2hf-neon-poky-linux-gnueabi/systemd/1_250.5-r0/build/systemd-analyze and ./tmp/work/cortexa9t2hf-neon-poky-linux-gnueabi/systemd/1_250.5-r0/build/src/shared/libsystemd-shared-250.so. These paths depend on the exact version of systemd as well as the build configuration and may not be correct in your case.

Uploading the troubleshooting software

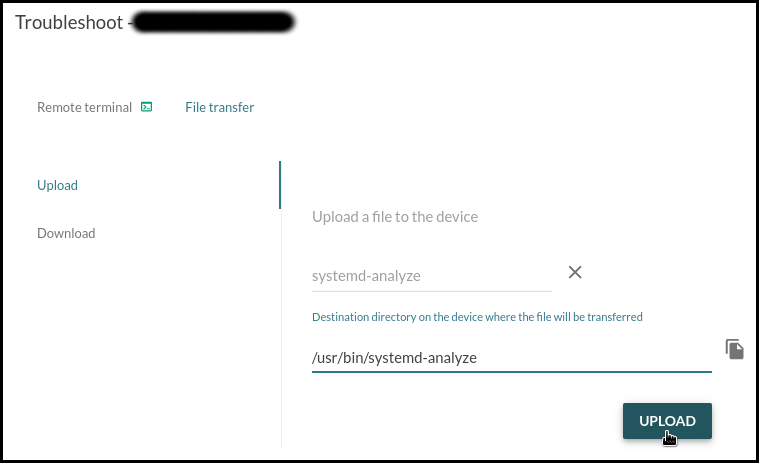
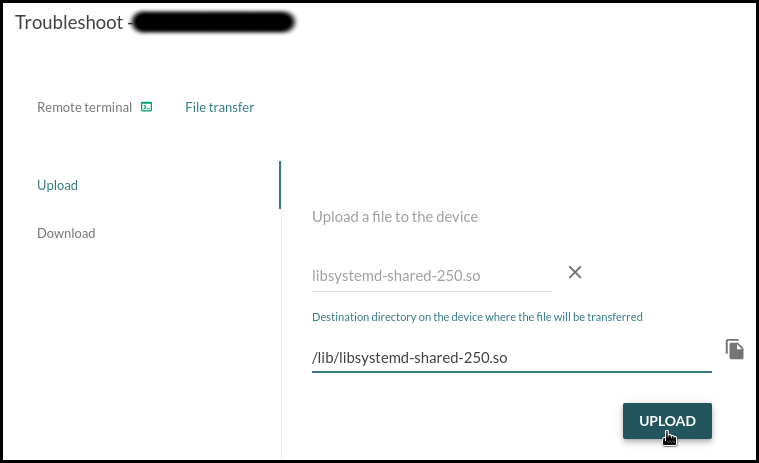
Upload these files to the board using Mender’s File Transfer utility:

  • systemd-analyze into /usr/bin/
  • libsystemd-shared-<version>.so into /usr/lib/

Fetching service initialization logs

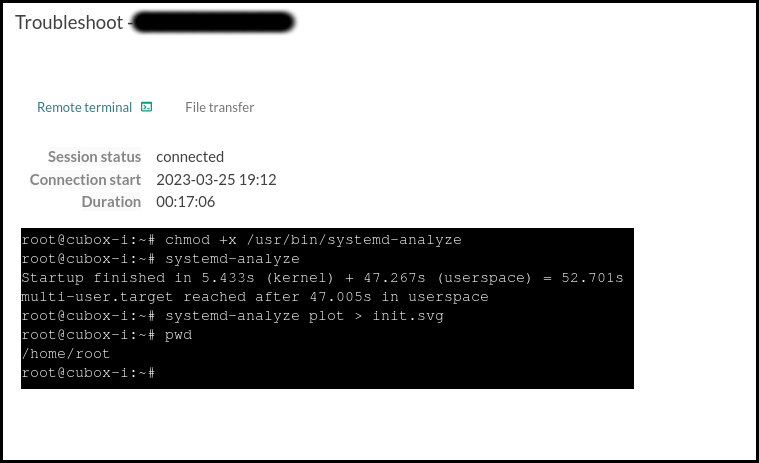
Once the troubleshooting software is uploaded we can use the Remote Terminal to execute it.

Permit execution of the systemd-analyze binary:

# chmod +x /usr/bin/systemd-analyze

Check the time it took for the system to initialize:

# systemd-analyze

Export a graphic of all enabled services and the time they took to initialize:

# systemd-analyze plot > init.svg

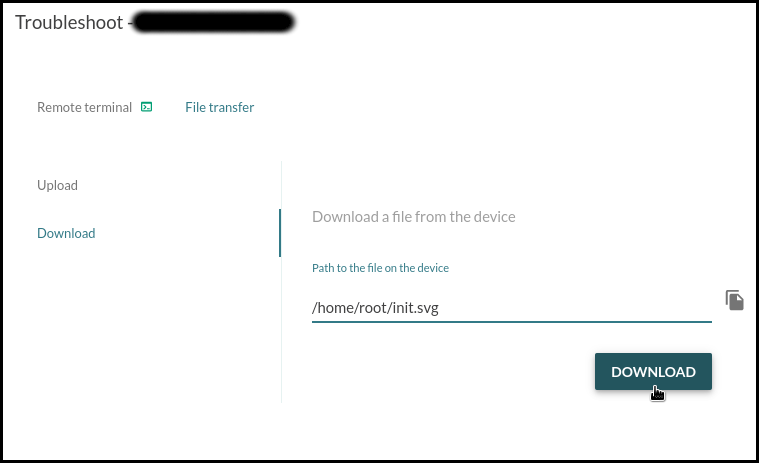
Download init.svg:

This graphic shows that the device needs around a minute to reach multi-user.target. The longest task is the resizing of the /data partition that runs on first boot and the second longest is the filesystem check for mmcblk1p1 that runs every time the system boots.

Here is another graphic generated after a reboot:

This article demonstrates how to use Mender’s Remote terminal and File Transfer troubleshooting utilities to upload and execute the systemd-analyze binary to profile the initialization process of systemd services. These troubleshooting utilities can be used for variety of different tasks. After debugging a single device and finding an appropriate fix, Mender is capable of performing an A/B or delta software update to all devices or specific group of devices in the field.

Since the earliest days of the OpenEmbedded build framework and the Yocto Project, Konsulko engineers have been contributing to the community and helping customers build commercial products with these technologies. We have experience with RAUC, Mender and other open source solutions for software updates. Please contact us to discuss your own embedded product needs.

Setting up RAUC on CuBox-I/HummingBoard for Software Updates

(This article was written by open source software enthusiast and Konsulko Group intern Atanas Bunchev, working with Konsulko Senior Engineer Leon Anavi.)

RAUC is one of the popular solutions that provide OTA (over-the-air) updates for Embedded Linux devices. RAUC is developed with focus on stability, security and flexibility and is compatible with all popular build systems: The Yocto Project/OpenEmbedded, Buildroot and PTXdist.

RAUC is capable of covering various use cases the most simple one being A/B updates.

The A/B updates scenario consists of having 2 identical root filesystems (named A and B), booting from one of them and performing the update on the other. After the update is complete the bootloader will boot from the updated partition on the next system boot. Recently the ‘verity’ update bundle format was introduced in RAUC. This new groundbreaking feature improves the verification process and most importantly allows extending RAUC by built-in HTTP(S) network streaming support, adaptive delta-like updates, and full update bundle encryption.

This article provides an example for setting up RAUC for A/B updates scenario on a HummingBoard board. The hardware used for the example is:

  • HummingBoard Pro board
  • 32GB microSD card
  • UART to USB adapter

RAUC is a robust, powerful and flexible open source solution that requires advanced skills for initial integration. To use RAUC in an image built with the Yocto Project and OpenEmbedded for CuBox-I/HummingBoard one needs to:

  • Use U-Boot as a bootloader
  • Enable SquashFS in the Linux kernel configuration
  • Use ext4 root file system
  • Design specific storage partitioning for the certain use case and configure RAUC accordingly
  • Provide a custom U-Boot script to properly switch between RAUC slots
  • Prepare a certificate and keyring to use for signing and verifying RAUC update bundles.

Building a Linux Distribution with RAUC

I’ve recently contributed to meta-rauc-community, a repository containing minimal RAUC example layers for Yocto/OpenEmbedded.

The following steps will show how to use the meta-rauc-nxp layer from that repository to build and update a minimal Linux distribution. The update will install nano (the text editor) to the system.

Download the reference Yocto distribution, Poky.
We’ll use the latest long term support version, kirkstone.

$ git clone -b kirkstone https://git.yoctoproject.org/poky
$ cd poky

Download meta-rauc-community layers (meta-rauc-nxp):

$ git clone https://github.com/rauc/meta-rauc-community.git

Download the meta-rauc layer:

$ git clone -b kirkstone https://github.com/rauc/meta-rauc.git

Download the BSP layers for cubox-i/HumminbBoard boards:

$ git clone -b kirkstone https://git.yoctoproject.org/meta-freescale
$ git clone -b kirkstone https://github.com/Freescale/meta-fsl-arm-extra.git

Download the meta-openembedded layer (provides nano):

$ git clone -b kirkstone git://git.openembedded.org/meta-openembedded

Initialize the build environment:

$ source oe-init-build-env

Add the layers to conf/bblayers.conf:

$ bitbake-layers add-layer ../meta-openembedded/meta-oe
$ bitbake-layers add-layer ../meta-rauc
$ bitbake-layers add-layer ../meta-freescale
$ bitbake-layers add-layer ../meta-fsl-arm-extra
$ bitbake-layers add-layer ../meta-rauc-community/meta-rauc-nxp

Adjust conf/local.conf by adding the following configurations to the end of the file:

# HummingBoard specifications are very similar to Cubox-I
MACHINE = "cubox-i"

# Accept end user agreement required by the BSP layer.
ACCEPT_FSL_EULA = "1"

# Use systemd as init manager
INIT_MANAGER = "systemd"

# Add RAUC to the image
IMAGE_INSTALL:append = " rauc"
DISTRO_FEATURES:append = " rauc"

# Generate ext4 image of the filesystem
IMAGE_FSTYPES:append = " ext4"

# Use the file containing the partition table specification
WKS_FILE = "sdimage-dual-cubox-i.wks.in"
WKS_FILES:prepend = "sdimage-dual-cubox-i.wks.in "

# Add 150 000 KBytes free space to the root filesystem
# (Adding software with updates require space.)
IMAGE_ROOTFS_EXTRA_SPACE:append = " + 150000"

# Add the boot script to the boot partition
IMAGE_BOOT_FILES:append = " boot.scr"

Note that whitespace inside quotes is intentional and important.

To sign and verify the update bundles RAUC uses SSL keys. A keyring containing all keys that will be used for update bundles needs to be installed on the target.

meta-rauc-community provides a script that would generate example keys and configure the current build environment accordingly. (The script has to be called after sourcing oe-init-build-env)

$ ../meta-rauc-community/create-example-keys.sh

Build a minimal bootable image:

$ bitbake core-image-minimal

Building an image from scratch is a long process involving a lot of tasks. Please patiently wait until bitbake completes all tasks.

It’s strongly recommended to zero-fill the u-boot environment sectors before flashing the image on the microSD card (replace /dev/sdX with the proper device path):

$ dd if=/dev/zero of=/dev/sdX seek=2032 count=16

After the build is done, flash the image to a microSD card (replace /dev/sdX with the proper device path) and boot it on the HummingBoard:

$ bmaptool copy tmp/deploy/images/cubox-i/core-image-minimal-cubox-i.wic.gz /dev/sdX
$ sync
$ eject /dev/sdX

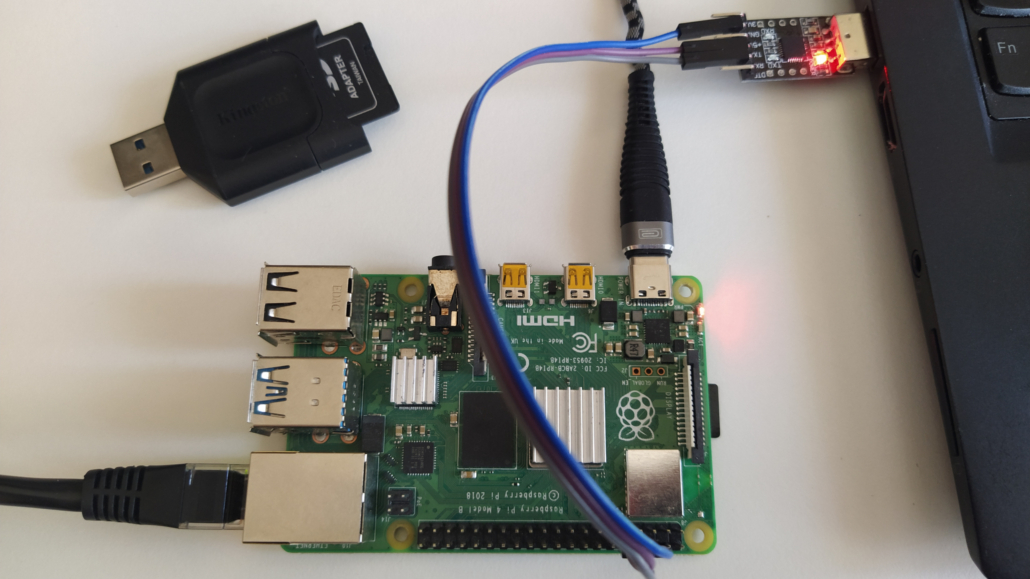
Attach the USB-to-UART adapter to the HummingBoard Pro, plug the ethernet cable and the microSD card. Turn on the board to verify that the system boots successfully.

By default one can login as root without password.

Creating an update bundle for RAUC

After sourcing the oe-init-build-env, append the following line to the build configuration conf/local.conf to add nano to the system:

# Adding nano
IMAGE_INSTALL:append = " nano"

Build the RAUC update bundle:

$ bitbake update-bundle

Start a web server:

$ cd tmp/deploy/images/cubox-i/
$ pip3 install --user rangehttpserver
$ python3 -m RangeHTTPServer

Now you can install the bundle on the board, then reboot:

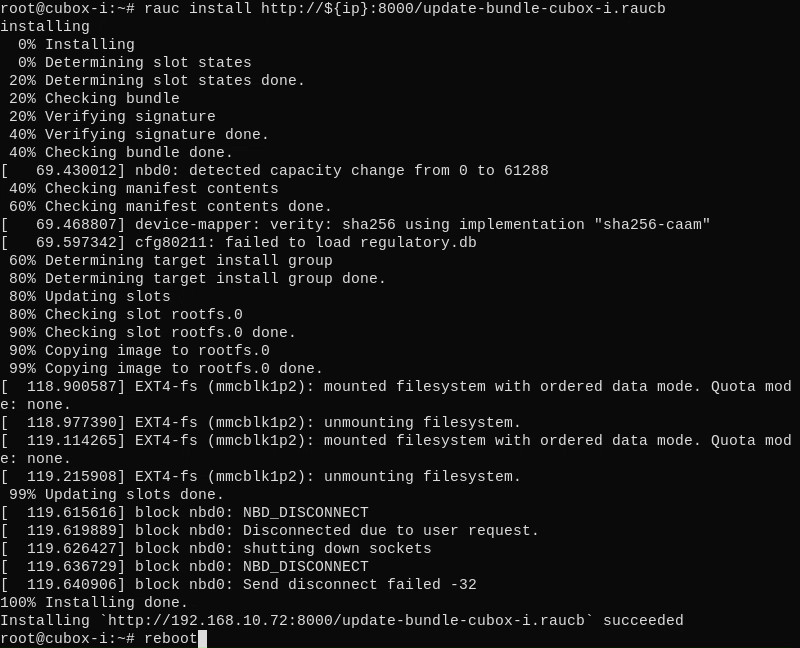
# rauc install http://192.168.1.2:8000/update-bundle-cubox-i.raucb
# reboot

One of the latest RAUC features is the verity bundle format. This format allows updates to be done without storing the whole bundle on the device in advance, which is useful for devices with limited space. One of the requirements for this feature is hosting the bundle on a server that supports HTTP Range Requests.

As alternative, you can transfer the bundle to the device and install it from local storage.

Verify that nano was added to the system:

# which nano

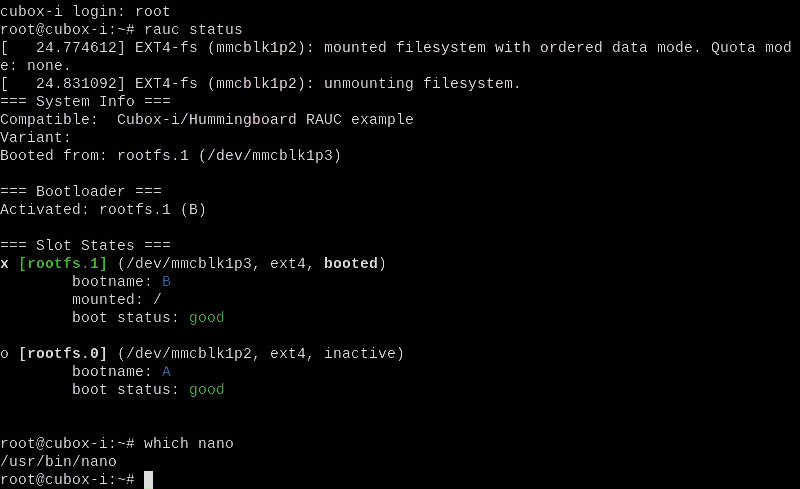
Check RAUC status to confirm the system have booted from the second partition:

# rauc status

For real-world products, this build procedure with the Yocto Project and OpenEmbedded can be optimized further with just a few commands for easy implementation of continuous integration (CI).

Since the earliest days of the OpenEmbedded build framework and Yocto Project, Konsulko engineers have been contributing to the community and helping customers build commercial products with these technologies. We have experience with RAUC, Mender and other open source solutions for software updates. Please contact us to discuss your own embedded product development.

Using kernel config fragments to remove an unwanted feature

Adding a feature to a linux-yocto based kernel is fairly well documented. This makes sense because it is the most common thing you might want to do: “My board needs support for this sensor added to our BSP.”

Konsulko Group recently helped a customer that had exactly the opposite problem, a standard feature in linux-intel (which includes linux-yocto.inc and inherits the kernel-yocto class) needed to be removed. The SoC (in the Intel™ “Bay Trail” family) and the off-the-shelf industrial PC had a problem. When USB 3.0 (xHCI) support is enabled, the default BIOS settings (xHCI Mode = Auto) would cause the system to lock-up upon either warm reboot or shutdown. Given that these systems are deeply embedded in the field—where simply “hooking up a display, keyboard and mouse” is cost prohibitive—we needed to find an option that would not prevent OTA updates.

You might think you could apply a patch via SRC_URI to kmeta (yocto-kernel-cache), but this isn’t supported in the Yocto Project kernel tooling. Instead we can apply kernel config fragments that disable the problematic xHCI feature. The trade off is that USB 3.x devices won’t be able to run at full speed, but the systems in question have no need for USB 3.0 (they are a classic IoT gateway use case).

Determining your existing kernel configuration

The first thing you want to do in this situation is determine what your (default) kernel configuration is. In our case, Konsulko and our customer are using the ‘dunfell’ (3.1.x) branch of meta-intel with MACHINE="intel-corei7-64". Upon building an image or the kernel (e.g. bitbake virtual/kernel or bitbake linux-intel), the kernel configuration can be found at the following path:

<build>tmp/work/corei7-64-intel-common-poky-linux/linux-intel/5.4.170+gitAUTOINC+98cce1c95f_36f93ff941-r0/linux-corei7-64-intel-common-standard-build/.config

Where the kernel version is 5.4.170, the (shortened) git commit hash of the kernel cache is 98cce1c95f and the (shortened) git commit hash of the kernel source is 36f93ff941.

Modifying the kernel configuration with menuconfig

The documented way to modify the kernel configuration is with:

bitbake -c menuconfig linux-intel

This approach works fine, but you must remember to copy the resulting .config to defconfig in your recipe’s SRC_URI.

Alternatively you can create your kernel config fragments in the kernel build directory and then add them to your kernel recipe. The fragments can be created with the help of the diffconfig script in the kernel source tree.

Also note that you must have already run:

$ bitbake -c kernel_configme -f linux-intel

or previously built the kernel in order for the .config to be present.

Modifying the kernel configuration with devtool

It will come as no surprise that my preferred way to modify the kernel configuration is to run:

$ devtool menuconfig linux-intel

But you will get an error:

ERROR: No recipe named 'linux-intel' in your workspace

So first we must get the kernel recipe into our workspace:

$ devtool modify linux-intel

Now we are able to run:

$ devtool menuconfig linux-intel

One benefit of this approach is that devtool will run the required steps that need to happen before menuconfig can be run (most notably the do_kernel_configme task).

Determining the changes needed

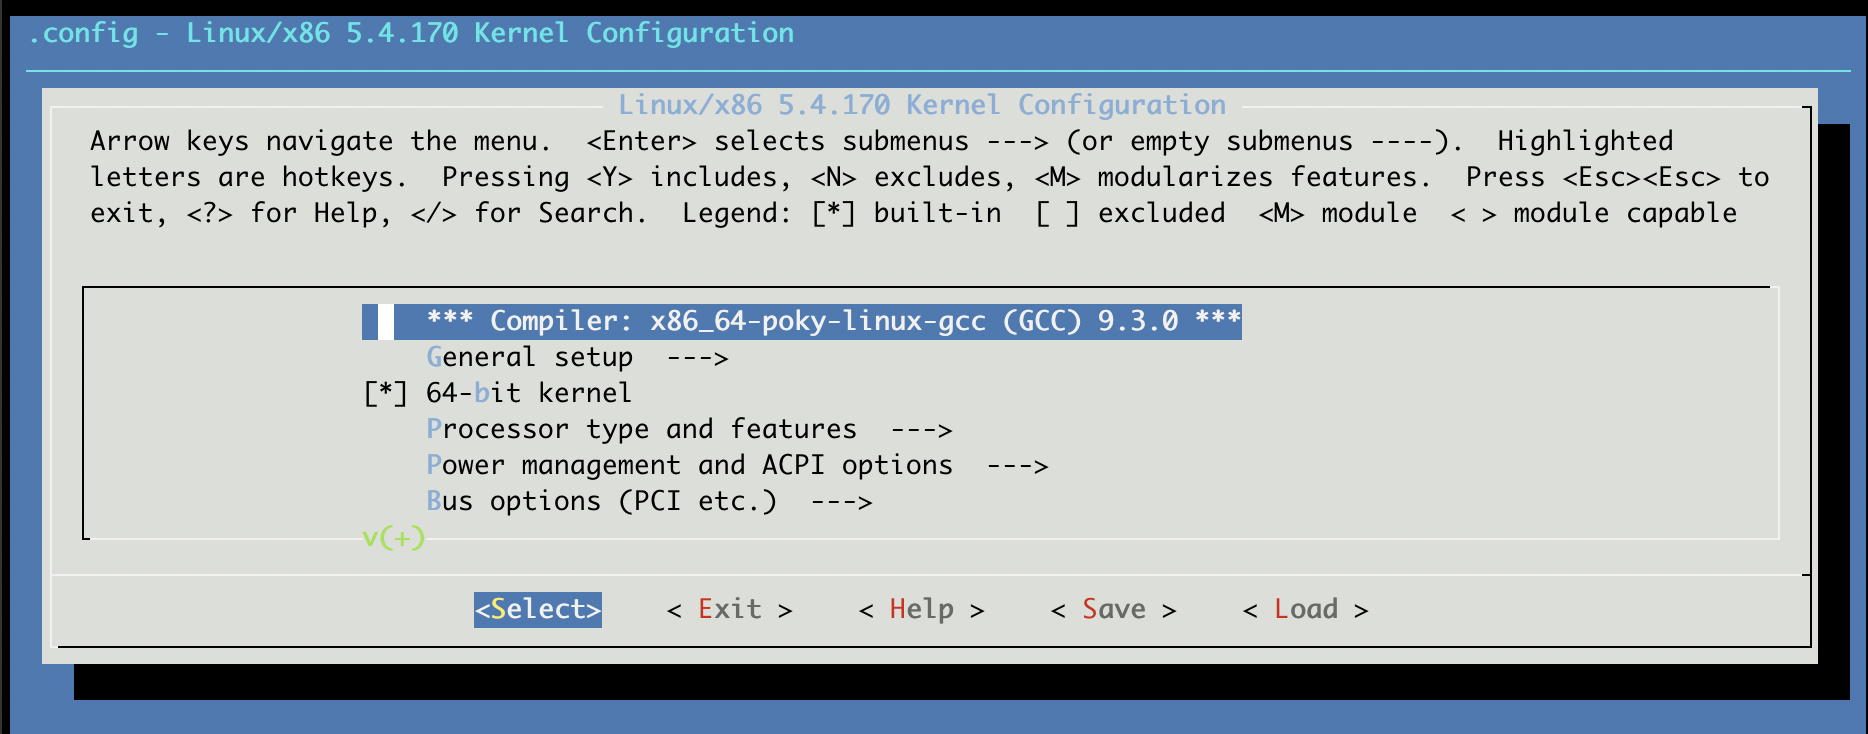
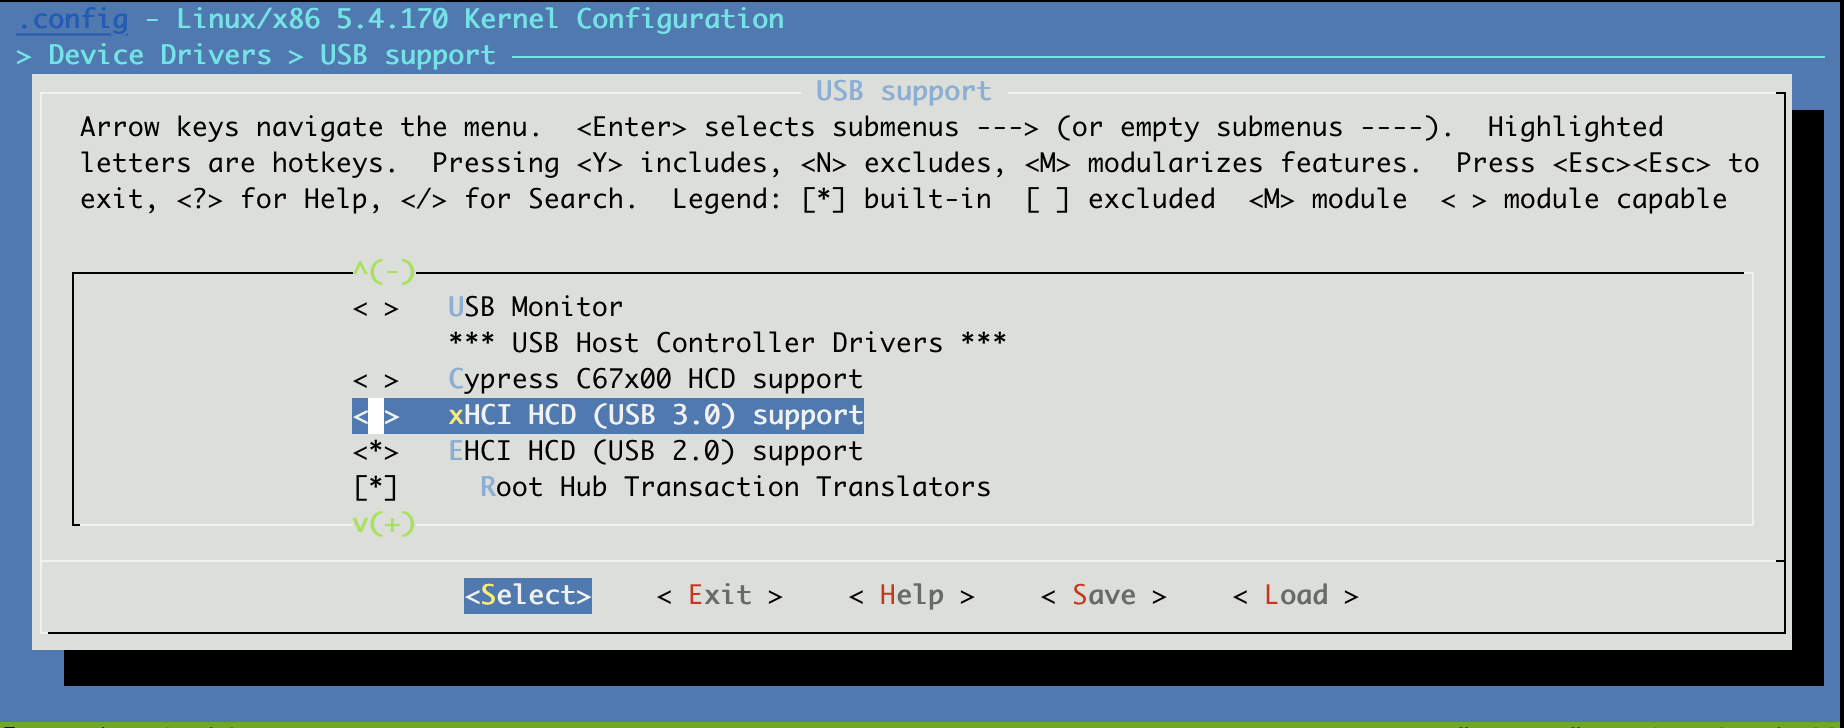
Regardless of which method you used to run menuconfig, you will now be presented with the text UI:

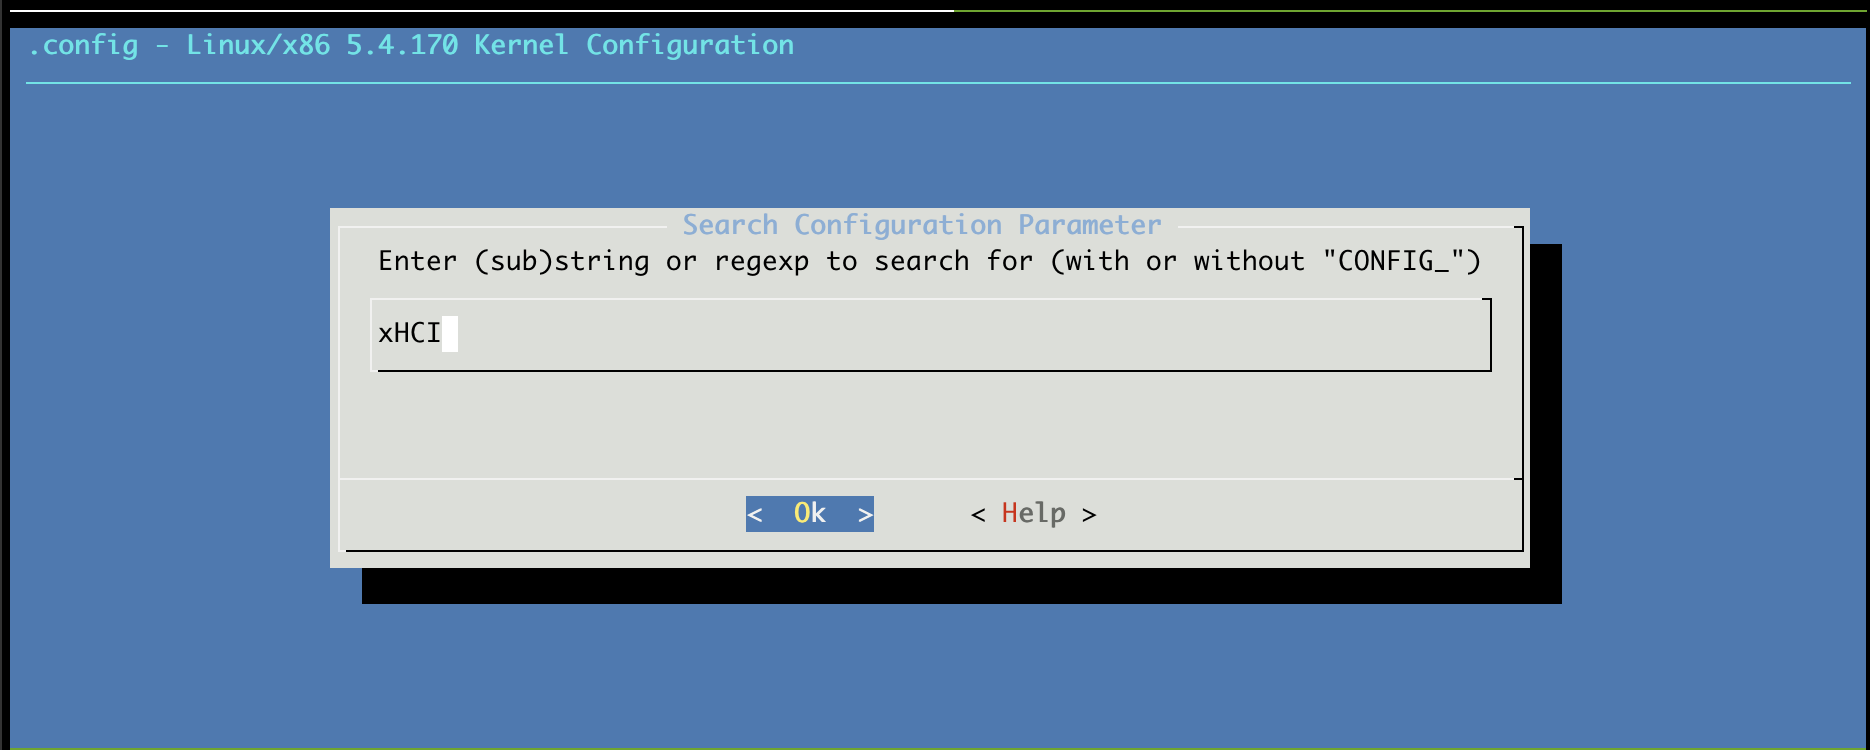
Since Konsulko and our customer already knew we needed to change the xHCI enablement, we can quickly </> for Search and then enter xHCI.

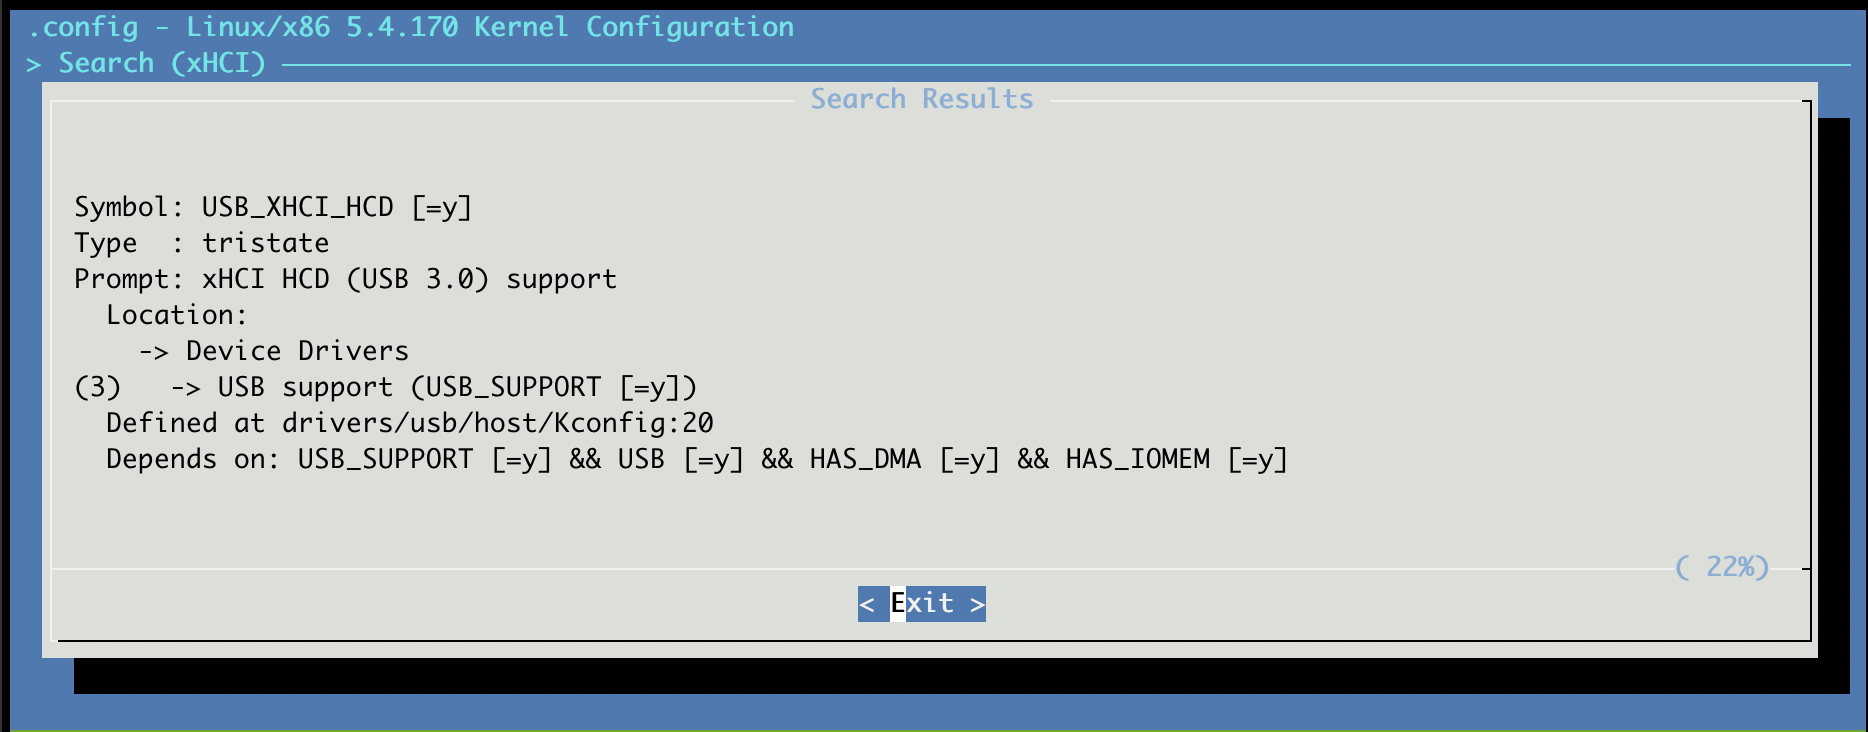
This gives us several results, but the ones that we care about have [=y](built-in) next to them:

  1. CONFIG_USB_XHCI_HCD
  2. CONFIG_USB_XHCI_PCI
  3. CONFIG_USB_XHCI_PLATFORM

The top level item that needs to be disabled (set to N) is CONFIG_USB_XHCI_HCD:

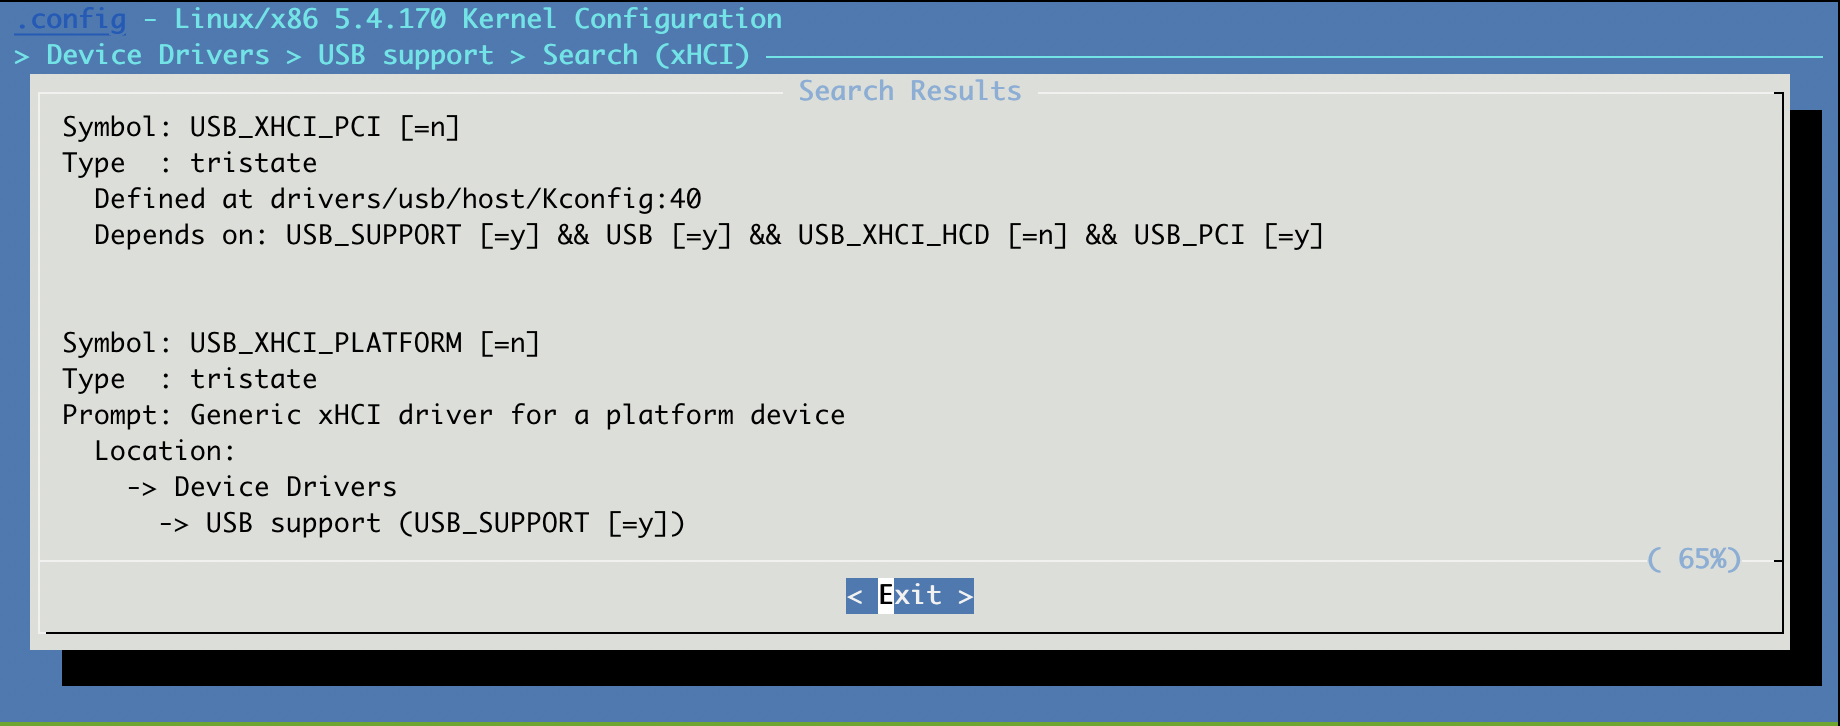
After this we can spot check the other values are also disabled (by using </> for Search again):
CONFIG_USB_XHCI_PCI and CONFIG_USB_XHCI_PLATFORM:

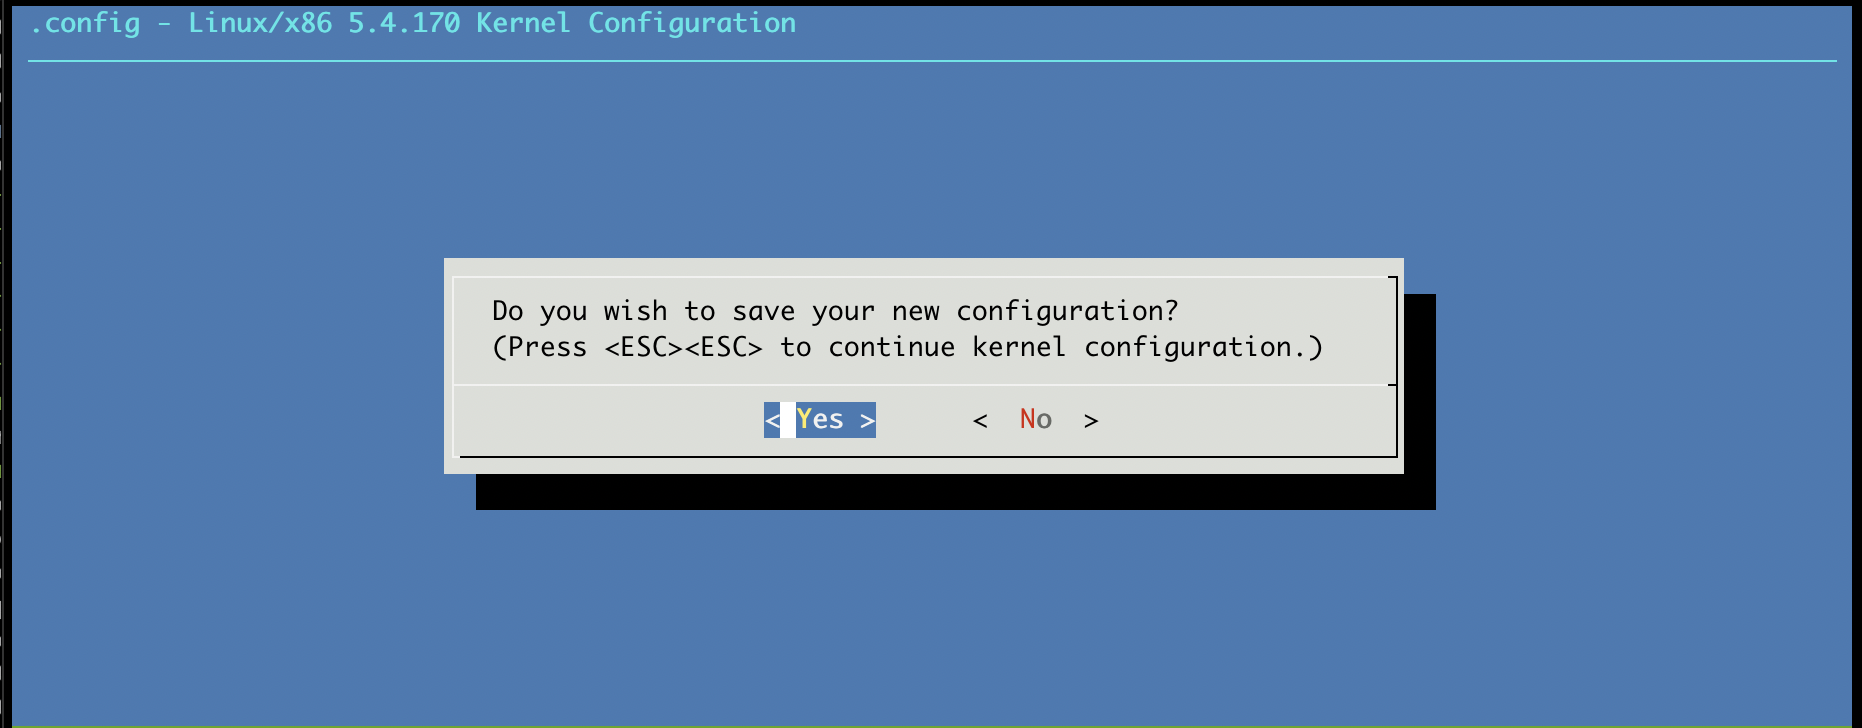
Satisfied that we have the needed change, we can save our configuration. Press the <E> key or click on < Exit > to exit the sub-menus until you are at the top of the stack. Press the <S> key or click on < Save > to save the configuration. At they prompt, press enter or click on <Yes>.

Now, the benefit of the devtool workflow comes into play, because we are rewarded with:

INFO: Updating config fragment <build>/workspace/sources/linux-intel/oe-local-files/devtool-fragment.cfg

The contents of this file are what you might expect:

# CONFIG_USB_XHCI_HCD is not set

Applying our configuration change

If we don’t already have one, we need a layer into which to put our changes:

$ bitbake-layers create-layer ~/Projects/meta-awesome-bsp

Add the layer to our active layers:

$ bitbake-layers add-layer ~/Projects/meta-awesome-bsp

Create a directory–following the pattern in openembedded-core–for our kernel changes:

$ mkdir -p ~/Projects/meta-awesome-bsp/recipes-kernel/linux

Finish our recipe:

$ devtool finish linux-intel ~/Projects/meta-awesome-bsp

Examine the resulting directory structure:

$ tree ~/Projects/meta-awesome-bsp
/home/<user>/Projects/meta-awesome-bsp
├── conf
│&nbsp;&nbsp; └── layer.conf
├── COPYING.MIT
├── README
├── recipes-example
│&nbsp;&nbsp; └── example
│&nbsp;&nbsp;     └── example_0.1.bb
└── recipes-kernel
    └── linux
        ├── linux-intel
        │&nbsp;&nbsp; └── devtool-fragment.cfg
        └── linux-intel_%.bbappend

Since this might not be the only change to the kernel we will need to make, let us give the fragment a better name:

pushd ~/Projects/meta-awesome/recipes-kernel/linux/linux-intel
mv devtool-fragment.cfg disable-xhci-hcd.cfg

And create an .scc file to give the Yocto Project kernel tooling better hints of how to apply our change:

cat << EOF >> disable-xhci-hcd.scc
# SPDX-License-Identifier: MIT
define KFEATURE_DESCRIPTION "Disable options for xhci (USB 3.0)"
define KFEATURE_COMPATIBILITY board

kconf hardware disable-xhci-hcd.cfg
EOF

And finally make changes to our linux-intel_%.bbappend to reflect these files:

$ cd ..
$ cat linux-intel_%.bbappend
FILESEXTRAPATHS_prepend := "${THISDIR}/${PN}:"

SRC_URI += "\
    file://disable-xhci-hcd.cfg \
    file://disable-xhci-hcd.scc \
"

Now—as long as our layer has high enough priority and no other recipes add kernel config fragments which conflict with our change—we should be able to build the kernel and inspect the resulting .config:

$ popd
$ bitbake linux-intel
$ grep -R XHCI tmp/work/corei7-64-intel-common-poky-linux/linux-intel/5.4.170+gitAUTOINC+98cce1c95f_36f93ff941-r0/linux-corei7-64-intel-common-standard-build/.config
# CONFIG_USB_XHCI_HCD is not set
# CONFIG_USB_ROLES_INTEL_XHCI is not set

We should also be able to run dmesg | grep xhci on the target and we would not expect to see any messages.

Summary

A Konsulko Group customer had a hardware problem that required us to remove a kernel feature. By using tools like devtool, we were able to fairly easily make a change to the kernel configuration and capture those changes in a persistent way with a .cfg fragment and a .bbappend. This approach solved the problem and allowed OTA updates to proceed to these deeply embedded devices in the field. Please contact us to discuss how Konsulko can help you with the unique requirements of your commercial project.

Building a DIY SOHO router, 18 months later

Building a DIY SOHO router using the Yocto Project build system OpenEmbedded, 18 months later

It’s been around a year since my last post on this project, and 18 months since I posted the article series itself. In the world of home networking equipment that’s practically a lifetime. So it’s worth doing a check-in on this project, I think.

My little router is still going just fine. In terms of things I had talked about earlier in the series, I’m still using the ability to easily roll back a test image to try out backports. Most recently, I tried to add IPv6 Prefix Delegation support to the DHCPv6 client in an older version of systemd. It didn’t work, but with just a reboot I was back to my normal image. As times change, devices at home change, and I’m using the dnsmasq configuration file to document what devices are in the house. Performance? Still doing just great. The next time I do one of these series, my household might have crossed the threshold where newer WiFi standards are in enough devices we own that I want something that handles them, but we aren’t there yet. By then I might also just have a new PCIe card to drop in.

In terms of the article series itself, it’s a testament to the stability of the Yocto Project and everyone who works on it. Since the original posts, Mender has internally upgraded a significant amount, and in turn some of the examples there aren’t quite correct for a modern build. Mender has excellent documentation, however, and it’s been easy to update my build to work all along the way and upgrade from the older version to the new. Everything else? Yes, that’s all still correct. What prompted this particular post is that the Yocto Project has announced another milestone release, and that’s always a good time to make sure my device is up to date. My latest changes were quite literally just renaming the Linux kernel bbappend file and saying the layer is compatible with the new release. That was less work than updating the firewall rules to take in to account both Daylight Savings Time changes and that my kids are a bit older and realistically want to be online a little later.

Getting Started with RAUC on Raspberry Pi

RAUC is a secure, robust and flexible open source software for A/B updates of Embedded Linux devices. It is appropriate for various use cases and it is compatible with all popular build systems: The Yocto Project/ OpenEmbedded, Buildroot and PTXdist.

Konsulko Group engineers have experience with all popular open source solutions for software over the air updates of embedded Linux devices, including Mender, SWUPdate, HERE OTA Connect based on OSTree and Aktualizr. In this article we will discuss the exact steps to integrate RAUC with the Yocto Project (YP) and OpenEmbedded (OE) for Raspberry Pi – the most popular single board computer among students, hobbyists and makers.

For the practical example in this article we will be using the latest and greatest Raspberry Pi as of the moment: Raspberry Pi 4 Model B. Versions with different RAM sizes are available on the market. Any of these Raspberry Pi 4 Model B versions are OK for this RAUC demonstration.

As long time developers and users of the Yocto Project and OpenEmbedded, both have become favorite tools for creating customized distributions for Konsulko engineers. We frequently use and support them commercially. The Yocto Project is a Linux Foundation collaborative open source project for creating custom Linux distributions for embedded devices. It is based on Poky, the reference distribution of the Yocto Project, using the OpenEmbedded build system. The Yocto Project releases on a 6-month cadence. As of the time of this writing, the latest stable release is Dunfell (3.1).

RAUC is a powerful and flexible open source solution that requires advanced skills for initial integration. To use RAUC in an image for Raspberry Pi built with the Yocto Project and OpenEmbedded, it requires:

  • U-Boot as a bootloader
  • Enabled SquashFS in the Linux kernel configurations
  • ext4 root file system
  • Specific partitioning of the microSD card that matches the RAUC slots
  • U-Boot environment configurations and a script to properly switch RAUC slots
  • Certificate and a keyring to RAUC’s system.conf

RAUC is capable of covering various use cases and scenarios, including advanced options for single or redundant data partitions. Upgrades are performed through the so called RAUC bundles. It is possible to install them over the air or using the old-fashioned method with a USB stick. For managing updates to a fleet of Internet of Things, it is possible to integrate RAUC with Eclipse hawkBit project that acts as a deployment server with a nice web user interface.

For the sake of simplicity, this article focuses on the most simple and straight-forward use case with 2 identical RAUC slots: A and B. For each slot we will have a separate partition on the microSD card for Raspberry Pi. We have already covered most of the RAUC requirements in an additional Yocto/OE layer called meta-rauc-raspberrypi. We will use it to put the pieces together. First we will build a minimal bootable image for Raspberry Pi 4 with RAUC. We will flash it to both A and B slots. After that we will build a RAUC bundle that adds the text editor nano. Finally we will install this RAUC bundle on the B slot, reboot and verify that nano is present.

Building a Linux Distribution with RAUC

Follow the steps below to build a minimal image for Raspberry Pi with Yocto, OpenEmbedded and RAUC as well as to perform a software update:

  • Download Poky, the reference distribution of the Yocto Project:

git clone -b dunfell git://git.yoctoproject.org/poky poky-rpi-rauc
cd poky-rpi-rauc

  • Download meta-openembedded layer:

git clone -b dunfell git://git.openembedded.org/meta-openembedded

  • Download Yocto/OE BSP layer meta-raspberrypi:

git clone -b dunfell git://git.yoctoproject.org/meta-raspberrypi

  • Download Yocto/OE layers for RAUC:

git clone -b dunfell https://github.com/rauc/meta-rauc.git

git clone -b dunfell https://github.com/leon-anavi/meta-rauc-community.git

  • Initialize the build environment:

source oe-init-build-env

  • Add layers to conf/bblayers.conf:

bitbake-layers add-layer ../meta-openembedded/meta-oe/
bitbake-layers add-layer ../meta-openembedded/meta-python/
bitbake-layers add-layer ../meta-openembedded/meta-networking/
bitbake-layers add-layer ../meta-openembedded/meta-multimedia/
bitbake-layers add-layer ../meta-raspberrypi/
bitbake-layers add-layer ../meta-rauc
bitbake-layers add-layer ../meta-rauc-community/meta-rauc-raspberrypi/

  • Adjust conf/local.conf for Raspberry Pi 4 with systemd and RAUC by adding the following configurations to the end of the file:
MACHINE = "raspberrypi4"

DISTRO_FEATURES_append = " systemd"
VIRTUAL-RUNTIME_init_manager = "systemd"
DISTRO_FEATURES_BACKFILL_CONSIDERED = "sysvinit"
VIRTUAL-RUNTIME_initscripts = ""

IMAGE_INSTALL_append = " rauc"

IMAGE_FSTYPES="tar.bz2 ext4 wic.bz2 wic.bmap"
SDIMG_ROOTFS_TYPE="ext4"
ENABLE_UART = "1"
RPI_USE_U_BOOT = "1"
PREFERRED_PROVIDER_virtual/bootloader = "u-boot"

WKS_FILE = "sdimage-dual-raspberrypi.wks.in"
  • Build a minimal bootable image:

bitbake core-image-minimal

NOTE: Building an image from scratch requires a lot of operations and takes some time so please patiently wait until bitbake completes all tasks.

  • Flash the image to a microSD card and boot it on Raspberry Pi 4:

sudo umount /dev/sdX*
bzcat tmp/deploy/images/raspberrypi4/core-image-minimal-raspberrypi4.wic.bz2 | sudo dd of=/dev/sdX
sync

  • Attach USB to UART debug cable to Raspberry Pi 4, plug ethernet cable and the microSD card. Turn on Raspberry Pi 4. Verify that the system boots successfully.
  • Now, let’s extend the image with the simple text editor nano by adding the following line to the end of conf/local.conf:

IMAGE_INSTALL_append = " nano"

  • Build a RAUC bundle:

bitbake update-bundle

  • Start a web server:

cd tmp/deploy/images/raspberrypi4/
python3 -m http.server

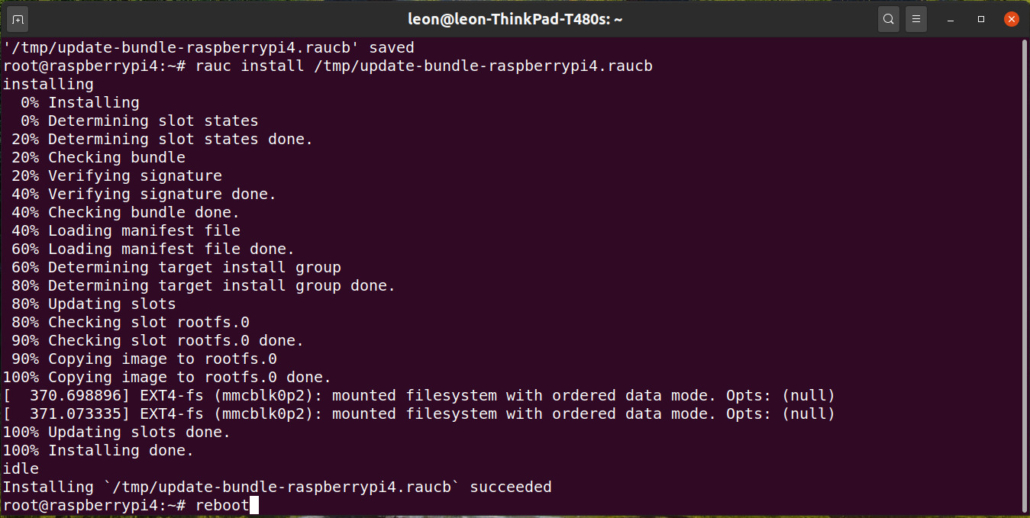
  • On the Raspberry Pi download the RAUC bundle, install it and reboot the board:

wget http://192.168.1.2:8000/update-bundle-raspberrypi4.raucb -P /tmp
rauc install /tmp/update-bundle-raspberrypi4.raucb
reboot

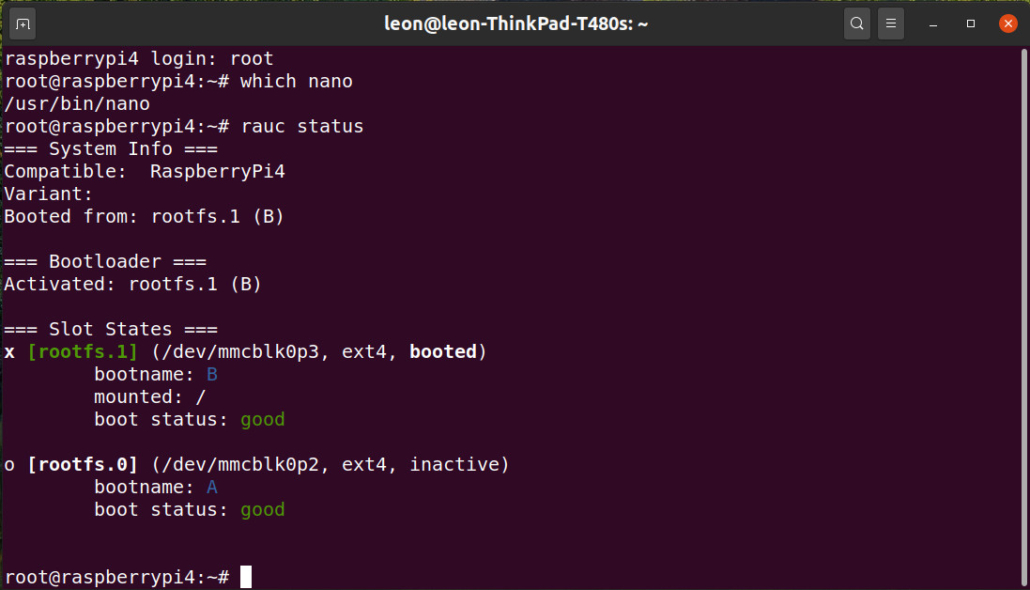
  • After successful upgrade with RAUC reboot the Raspberry Pi and verify that nano is now present:

which nano

  • Check RAUC status to confirm that now the second partition has been booted:

rauc status

For Internet of Things and other real-world products, the whole build procedure with the Yocto Project and OpenEmbedded can be optimized further to just a few commands for easy implementation of continuous integration (CI).

Konsulko engineers have been there since the earliest days of the OpenEmbedded build framework and the Yocto Project. We have experience with RAUC and various other open source solutions for software updates. Please contact us if you need your “own” rock-solid Linux distro for your own embedded product.


Helping Yocto Project work with Python 3

According to the statistics from StackOverflow Python is the fastest-growing major programming language. First released in 1991, Python is nowadays commonly used for various applications in multiple different industries. Python is a first class citizen of many embedded Linux systems.

The Yocto Project, a collaborative project of the Linux Foundation for creating custom Linux distributions for embedded devices, uses the OpenEmbedded build system and relies on layer meta-python from meta-openembedded to deliver Python 3 packages. Until recently, meta-python was providing both python 2 and python 3 versions of each package. The Python community decided that January 1, 2020, was the day to sunset Python 2. Since then Python 2 has been officially deprecated. This triggered major changes related to the support in Yocto and OpenEmbedded. All recipes for version 2 were moved to layer meta-python2 to provide legacy support after the end of life for this Python release. In meta-openembedded/meta-python, the OpenEmbedded community started efforts to remove all recipes for version 2 as well as to consolidate inc and bb files into a single bb file for version 3.

Konsulko Group engineers are regular contributors to various upstream open source projects, including meta-openembedded and more specifically to meta-python. In the past month, Leon Anavi joined the community efforts for consolidating Python 3 recipes in a single file as well as for upgrading various packages. Nowadays, most of the Python 3 recipes are utilizing the pypi bbclass which takes care for downloading and processing packages from pypi.org. This makes most of the upgrades to new releases of a Python package straight-forward. However, it is important to check the list of build and runtime dependencies as well as to ensure that bitbake still works fine with the upgraded recipe version for both x86-64 and ARM architectures prior to submission. 

Let’s have a closer look at the recipe python3-protobuf. It has been recently upgraded from version 3.11.3 to version 3.12.2. Protocol Buffers, also known as protobuf, are Google’s language-neutral, platform-neutral, extensible mechanism for serializing structured data. In the Yocto and OpenEmbedded ecosystem, recipe python3-protobuf depends on recipe protobuf from layer meta-oe. Both meta-oe and meta-python are part of meta-openembedded. So to avoid version mismatch and to ensure that bitbake will be able to successfully build python3-protobuf version 3.12.2 an upgrade of recipe protofobuf to the same version was mandatory. We contributed both upgrades to the master branch of the git repository meta-openembedded. The maintainers took care of cherry-picking them to the dunfell branch which is compatible with the latest stable release of the Yocto Project as of the moment. As a result, if you checkout the latest stable release of Poky, the reference system of the Yocto Project, and meta-openembedded you will be able to quickly build the latest version of protobuf and python3-protobuf out of the box.

Konsulko engineers have been there since the earliest days of the OpenEmbedded build framework and the Yocto Project. We continue to regularly make upstream contributions to these open source projects. Please contact us if you need your “own” Linux distro for your own embedded product.

Building a DIY SOHO router, 6 months on

Building a DIY SOHO router using the Yocto Project build system OpenEmbedded, 6 months on

A little more than six months ago, I posted part 4 of our series on making a SOHO router using the Yocto Project and OpenEmbedded. After 6 months of deployment, this is a good time to follow up on how the router has worked out in residential use.  The zeus code-name Yocto Project release was just announced, and that means that the release we started out with in part 1 is now close to being out of support.  That’s not a problem since we designed in support for moving to new software releases using Mender to deliver software updates.

One of the most important metrics in a project like this is, how does it perform?  From the standpoint of a family of 4 heavy internet users, it’s gone really well.  The WiFi range is only a little better than before, but that’s not really a function of the software.  Making everyone use Pi-hole has only resulted in a small number of places where I needed to override the blacklist and allow something in.  From an end-user point of view, this has worked as well as any off-the-shelf router.  From the administrator point of view, I’ve done scheduled maintenance during the day on a weekend, and it really did take only the 5 minutes I promised everyone rather than turning into one of those worst case scenarios where something broke and it takes an hour to fix it.  In fact, the update portion of the plan has gone exceedingly well.  While I didn’t make a post about moving to warrior from thud, I did that transition a while ago and it went smoothly.  Mender introduced a change that required attention be paid while migrating, but it was documented and went smoothly.  On the metadata side, the upgrade was as easy as one could hope.  A few of the bbappend files needed to be updated for a new version, and some of the changes I had made and pushed upstream as part of the original series were now just included, so they got dropped from my layer.

One of the things I touched on in the series was about using the update functionality to test development changes in a production environment.  The chance to do that came up with a systemd-networkd issue that was a problem in my local setup.  The upstream project requested people verify the problem exists with newer versions of systemd and a new enough version was available in what would become zeus.  So I made a quick weekend project of doing an update of my layers to build with a newer version of all of the metadata, removed the work-around, and flashed the image in place.  A quick reboot confirmed that the issue was indeed fixed, and then rather than commit to running an otherwise in-progress release I simply rebooted and automatically rolled back to my stable release.  With the network back up again, I updated the issue in upstream Bugzilla to let them know the problem was fixed.  After a bit longer, a few other people also confirmed it worked for them and now the issue is resolved.

In terms of the metadata itself, there have been a few clean-ups to what I did in my own layer with each release update I’ve done.  In the series I left out what hardware I was building on, and I also left out talking about using the linux–yocto recipe.  Since I first wrote the series linux-yocto has become easier to use, and I found this as part of reviewing my own changes like they were brand new with each upgrade.  I was setting some variables that initially didn’t have reasonable default values, and now they do and I don’t need to set them myself.  This in fact means that moving forward, rather than a version-specific kernel bbappend file, I can go with an always-used one to enable the additional kernel CONFIG options that I need for a time-based firewall.

I started out by mentioning that zeus has been released, and I’m working on migrating to it as I write this.  In fact, it’s so new that I’m doing my own little port of the meta-mender core layer to zeus for my needs. I expect that by the time I do my first update from one build of zeus to the next there will be an official update I’ll be able to use instead.  Looking forward, this was a great little project that also was a lot of fun.  The goals I set way back at the start have been met, and I’m happier with my network than I have been in a long time.  Of course, the list of features an off-the-shelf system provides is always growing, and there’s now monitoring and display items on my weekend project list now to keep up.  I foresee using and improving this setup for a long time to come.

Custom Linux Distro for NVIDIA CUDA Devices

How to get started and build a minimal custom Linux distribution for embedded NVIDIA CUDA-enabled devices using the Yocto Project (YP) and OpenEmbedded (OE).

Building a DIY SOHO router, Part 4

Building a DIY SOHO router using the Yocto Project build system OpenEmbedded, Part 4

In part three of this series I finished putting together what I wanted to have on my SOHO router and declared it to be done. While I plan to revisit the topic of a SOHO router using the Yocto Project and OpenEmbedded, this is the final part of the series. In this part, I want to focus on some of the things that I learned while doing the project.

The first thing is that I learned a lot about IPv6, specifically how it’s usually implemented within the United States for residential customers, and some of the implications of this implementation. The first thing to note is that I’ve been off-and-on trying to enable IPv6 for general IPv6 connectivity at home for some time now. Long before my ISP offered IPv6 service, I used Hurricane Electric to have a IPv6 tunnel and connectivity. This was great and only sometimes lead to problems, such as when Netflix finally supported IPv6 and began blocking well known tunnels for region-blocking reasons. It wasn’t until I started on this project that I decided to try to make real use of  routable addresses for hosting personal services. My expectations, and that of lots of software designed to manage IPv6 as well, are best described in article from RIPE about understanding IP addressing. In short, my house or “subscriber site” should get at least 256 LAN segments to do with as I want. Docker expects to have it’s own LAN segment to manage as part of configuring network bridges. When you have 256 or more LAN segments to use, that’s not a problem at all.

Unfortunately, my ISP provides only a single LAN segment. This is simultaneously more IPv6 addresses than the whole of IPv4 and something that should not be further subdivided in routing terms. I could subdivide my LAN segment, but this would in turn cause me to have to do a whole lot more work and headaches. That’s because at the routing level IPv6 is designed for my segment to be the smallest unit. Rather than deal with those headaches I switched my plans up from using Docker to using LXC. With LXC it’s easy to dump the container onto my LAN and then it picks up an IPv6 address the same way all of the other machines on my LAN do. This is good enough for my current needs, but it will make other things a lot harder down the line, if I want separation at the routing level for some devices.

But why am I doing that at all? Well, one of the benefits of having a small but still capable router is that I can run my own small services. While I don’t want to get into running my own email I think it makes a whole lot of sense to host my own chat server for example. With closed registration and no (or limited later on perhaps) federation with other servers I don’t need to worry about unauthorized users contacting my family nor do I have to worry about the company deciding it’s time to shutdown the service I use.

Another lesson learned is that while the Yocto Project has great QA, there’s always room to improve things. As part of picking a firewall I found that one of the netfilter logging options had been disabled by accident a while back. As a part of writing this series of articles and testing builds for qemux86-64, I found that one of the sound modules had been disabled. As a result, the instructions I wrote back in part 2 wouldn’t work. Working upstream is always fun and these changes have been merged and will be included in the next release.

I also worked on a few things for this project that I didn’t include directly in the relevant part of the series. For example, while I did include a number of full utilities in the list of packages installed in the router, I didn’t talk about replacing busybox entirely. This is something that OpenEmbedded supports using the PREFERRED_PROVIDERS and VIRTUAL-RUNTIME override mechanisms in the metadata. Prior to this article however, there wasn’t a good example on how to do this in upstream. Furthermore, there wasn’t an easy way to replace all of busybox and instead you had to list a single package and then include the rest of the required packages in your IMAGE_INSTALL or similar mechanism.  I am a fan of using busybox in places where I’m concerned about disk usage. However, on my router I have plenty of disk space so I want to be sure that if I have to go and solve a problem I’m not using my swiss army knife but rather have my full toolbox available. As a result, OpenEmbedded Core Master now has packagegroup-core-base-utils and a documented example of how to use that in local.conf.sample.extended. This means that when I refresh this image to be based on the Warrior branch I can remove a number of things from my IMAGE_INSTALL.

Another lesson is that old habits die hard.  In general, I always try to use the workflow where I make a change outside the device I’m working on, build the change in, and test it, rather than editing things live.  But when it’s “just” a quick one line change I’ll admit I do it live and roll it into my next build sometimes.  And then sometimes I forget to roll all my changes back up.  So while implementing this project I tried even harder than usual to not fall into that “just a quick change” mindset.  For the most part I’ve been successful at sticking to the idea workflow.  I really believe stateless is the right path forward.  And “for the most part” means that, yes, one time I did have to make use of the fact that the old rootfs was still mountable and copied a file over to the new rootfs, and then to the build machine.  I like to think of that as a reminder that A/B updates are more helpful than a “rewrite your disk each time” workflow for those occasional mistakes.

The caveat to the lesson above is because I really did the “git, bitbake, mender” cycle on this project. I didn’t start on it quite as soon as I said in the article, and I spent a lot more time toying with stuff in core-image-minimal instead of following my own advice, too.  I suppose that is the difference between writing a guide on how things should be done compared with how you do things when you just want to test one more thing, then switch over.  I really should have switched earlier however as every time I avoid doing the SD card shuffle it’s a win on a number of levels.

Did I say SD card above?  Yes, I did.  For this project, a 64GB “black box” that’s in the form-factor of a SD card will have as long of a life span as there is in the form-factor of a M.2 SSD or any other common storage format.  While my particular hardware has a SATA port, I don’t want to try to fit the required cabling, let alone the device itself in the case that’s recommended.  I will admit that I’m taking a bit of a risk here, I am putting as much frequent-write files under a ramfs as I can and after all, I did say stateless is a goal.  If everything does really die on me, I can be back up and running fairly quickly.

Last thing I learned is something I knew all along, really. I like the deeper ownership of the router. There’s both the pride and accomplishment in doing it and that “old school” fun of being the admin again, for real.

Building a DIY SOHO router, Part 3

Building a DIY SOHO router using the Yocto Project build system OpenEmbedded, Part 3

In part two of this series I created a local configuration layer for OpenEmbedded, and had the build target core-image-minimal producing an image. The image that was produced wasn’t really a router, but did let us bring up our board and look around. In this article, I’m going to create a custom image and populate it with additional software packages configured to my  requirements. I’m also going to get started using Over-The-Air (OTA) software updates on the device.

Now that I’ve proven that the image works on the hardware, I can really get down to implementing the project of making a router.  While I could continue to add things to core-image-minimal, it really makes sense at this point to stop and create my own image. Since I want something relatively small, I will still start with core-image-minimal as the base.  Moving back over to meta-local-soho, I’m creating the recipes-core/images directory and then populating core-image-minimal-router.bb with:

require recipes-core/images/core-image-minimal.bb

DESCRIPTION = "Small image for use as a router"

IMAGE_FEATURES += "ssh-server-openssh"
IMAGE_FEATURES += "empty-root-password allow-empty-password allow-root-login"

IMAGE_INSTALL += "\
    "
MENDER_STORAGE_TOTAL_SIZE_MB = "4096"

This tells bitbake that it must have core-image-minimal.bb available and to include it. I then provide a new DESCRIPTION to describe the new image. Next, I include a number of new features in the image. First, I’ll use the normal hook for adding a SSH server. Then I’ll add a line of features for development mode that I’ll remove later.  These features, as their names imply, allow for root to login without a password. This is quite handy for development and quite unwise for production. I’ll circle back and remove these development features later. Next, I give myself an empty list of additional packages to be filled out later. Finally, I tell Mender that it has 4096 megabytes of disk space to work with.  I’m going to hide space from Mender so that I can entirely control that part myself instead. At this point I can build core-image-minimal-router, and it will complete very quickly as I’ve not yet added any packages that have not been previously built. So it’s time to once again git add, git commit, and bitbake these changes.

At this point, I want to flash the new image onto the device and boot it up. The reason for this is that the new image can be used with Mender to test any subsequent image builds. The system is now functional enough to support delivering new image updates via Mender, so it’s good to get into the habit of using the OTA update workflow. It also forces me to treat the device as if it’s really stateless. I’ll talk about how to apply an OTA update when I make the next set of changes.

Now it’s time to begin adding content to the custom image. The first thing I’m going to do is borrow some logic from packagegroup-machine-base. I don’t want to use this packagegroup directly because it will cause bitbake to build a lot of extra stuff that I don’t end up installing. This is due to the fact that it’s part of packagegroup-base.bb (because it’s needed to resolve dependencies of other parts of the packagegroup). Instead, I’m going to add:

    ${MACHINE_EXTRA_RDEPENDS} \
    ${MACHINE_EXTRA_RRECOMMENDS} \

to IMAGE_INSTALL so that any additional machine-specific functionality that’s been specified is installed to the image. Next, I’ll add in kernel-modules to the list so that all of the modules that have been built for the kernel are installed to the image. This will be a lot easier than listing out every module I may need, especially for later on when it comes to various firewall rules I want to use.  On top of all of this, I also want to drop in a bunch of full-versions of common packages I use, and then let busybox fill in the rest.

    bind-utils \
    coreutils \
    findutils \
    iputils-ping \
    iputils-tracepath \
    iputils-traceroute6 \
    iproute2 \
    less \
    ncurses-terminfo \
    net-tools \
    procps \
    util-linux \

Almost everything in this list can be tweaked as desired. There are a couple items that serve a critical purpose and deserve an explanation:

  1. systemd calls out to $PAGER for many functions, including browsing logs with journalctl. If I don’t have the full version of less available, I won’t have a fully functional pager and browsing the output is extremely difficult.
  2. I don’t use xterm for my terminal emulator anymore so I want ncurses-terminfo installed. This ensures that the right terminfo is available and terminal output is correct.

At this point it’s time for a git add, git commit, and then a bitbake of our image too.

Now that I have a new image with additional content to try out, I want to put it on the device and confirm things work. As mentioned before, I’m using Mender in standalone mode since I have a single deployed device.  It’s very simple to serve the new image and then apply it. On the build machine, I do the following (change qemux86-64 to match the machine in use):

$ (cd tmp-glibc/deploy/images/qemux86-64; python3 -m http.server)

And then on the device:

# mender -rootfs http://build-server.local:8000/core-image-minimal-router-qemux86-64.mender
... wait while it downloads and applies ...
# reboot

Once the device comes back up, I’ve logged back in, and confirmed I’m satisfied with my changes, I do:

# mender -commit

This will mark what I am now running as the valid rootfs. However, if the device didn’t boot up or I couldn’t log in, I would simply not commit the changes. To do that I would then just reboot or otherwise power-cycle the device. If I don’t commit the changes to Mender then I get an automatic rollback to the previous install.  Of course, it’s also possible to use any HTTP server on the build machine.

At this point, it’s time to iterate over adding a number of different features that require little more than adding to IMAGE_INSTALL. Since I’ve talked about LXC, I need to add in lxc and gnupg (for verification of containers used from the download template). Once that’s added, I do the git add, git commit, bitbake, and then mender -rootfs cycle again and confirm LXC is working. One thing I noticed when doing this was that containers didn’t autostart because the service isn’t enabled by default.  Since I’m keeping this stateless, I changed that behavior with a bbappend file.  I also ended up installing e2fsprogs-mke2fs to be able to further partition my device to give LXC some room to work with.  This also means that I needed to have base-files provide the fstab that matches my setup, rather than the stock one.  Another small thing to cover is if your hardware does, or does not have a hardware random number genreator available.  If you do have one, you should pull in rng-tools on the image.  If you don’t have one however, you should install haveged to help feed the entropy pool instead.

Now I need to enable a functional access point. This is the first case where it’s really non-trivial to write up the config file to use, so it’s done a little bit differently.  The first step is to install hostapd and iw and boot that.  Now, on the device, edit /etc/hostapd.conf and iterate on editing and testing it on the device until everything is set up as desired. The iw tool can be helpful here to do things like perform a site scan to see what frequencies are already in use.  Once I’m done with the config, I copy the file out from the target and over to my build server with scp as /tmp/hostapd.conf. Then it’s time to make it stateless:

$ mkdir -p recipes-connectivity/hostapd/hostapd
$ cp /tmp/hostapd.conf recipes-connectivity/hostapd/hostapd/

And then I edit recipes-connectivity/hostapd/hostapd_%.bbappend to look like this:

FILESEXTRAPATHS_prepend := ":${THISDIR}/${PN}"

SRC_URI += "file://hostapd.conf"

do_install_append() {
    install -m 0644 ${WORKDIR}/hostapd.conf ${D}${sysconfdir}
}

SYSTEMD_AUTO_ENABLE_${PN} = "enable"

This will do two things. Everything except that last line is to tell bitbake to look in my layer for hostapd.conf and then to install it. The last thing is that now that we have a configured AP we want to start it automatically so have it be an enabled systemd service. Now it’s time once again for the git add, git commit, and so forth cycle.

The next step is to do the same kind of thing to dnsmasq. The good news that this time, the dnsmasq_%.bbappend file only needs one line:

FILESEXTRAPATHS_prepend := ":${THISDIR}/${PN}"

This is because the rest of the recipe already knows to grab dnsmasq.conf from a local file. In the case of my network, I need to pass in a few special options to some DHCP clients and have certain clients be given certain IP addresses, so I’ve gone with dnsmasq as my light-weight, but still fully featured IPv4 configuration server. I could have just as easily gone with ISC DHCPD instead, and it would look much the same as the above.  Conversely, if I didn’t need those few extra rules, I could just let systemd handle DHCP serving.  I left out IPv6 from my statement there as I am letting systemd handle that.

The only thing missing at this point from a router, aside from turning off developer mode features, is to add in a firewall. There are a few ways to go about this.  I already have systemd handling one of the aspects that is often associated with a firewall, setting up IPv4 NAT.  If the only other thing I needed on top of this is to shut the rest of the world out, I can use ufw and potentially even leverage its features that allow for adding iptables commands directly for slight enhancements.  While I have gone that direction for some projects, it’s not a good fit for this one. Instead, I chose to go with arno-iptables-firewall because I’m going to have a more complex setup. The process of customizing the firewall configuration is similar to how I customized hostapd and dnsmasq. That is, I iteratively configure it on the device, test for functionality, and copy the configuration files to my host.  This time, however, the arno-iptables-firewall_%.bbappend will look a little different:

FILESEXTRAPATHS_append := ":${THISDIR}/files"

SRC_URI += "file://firewall.conf \
            file://custom-rules \
"

do_install_append() {
    install -m 0644 ${WORKDIR}/firewall.conf \
    ${D}${sysconfdir}/arno-iptables-firewall/
    install -m 0644 ${WORKDIR}/custom-rules \
    ${D}${sysconfdir}/arno-iptables-firewall/
}

I have two files this time. The first one is the main config file, and the second one is the file that contains my custom rules. This is only necessary because I have a number of custom rules, otherwise it could be omitted.

At this point, looking back at the feature list I laid out in part one, I believe I can check all of my items off now.  I have the following all operational:

  1. access point
  2. firewall
  3. IPv4 and IPv6 network configuration
  4. containers 
  5. OTA software update

I’m building all of my software as hardened as my compiler will allow.  There’s very little state on the router itself to worry about backing up, and everything else is handled by my build server being backed up.  I’m confident in my OTA configuration as I’ve been using it for some time now in the development workflow. I’ve also tweaked the installed package list so that all of my favorite sysadmin tools are available.

At this point, it’s time to lock things down. First up, it’s time to go back to core-image-minimal-router.bb and remove that second line worth of IMAGE_FEATURES. Instead, I’m going to create a new local-user.bb recipe with my own user and SSH key. After listing local-user in IMAGE_INSTALL, I copy meta-skeleton/recipes-skeleton/useradd/useradd-example.bb to somewhere in meta-local-soho, and change it to look like this:

SUMMARY = "SOHO router user"
DESCRIPTION = "Add our own user to the image"
SECTION = "examples"
LICENSE = "MIT"
LIC_FILES_CHKSUM = "file://${COREBASE}/meta/COPYING.MIT;md5=3da9cfbcb788c80a0384361b4de20420"

SRC_URI = "file://authorized_keys"

S = "${WORKDIR}"

inherit useradd

# You must set USERADD_PACKAGES when you inherit useradd. This
# lists which output packages will include the user/group
# creation code.
USERADD_PACKAGES = "${PN}"

USERADD_PARAM_${PN} = "-u 1200 -d /data/trini -r -s /bin/bash trini"

do_install () {
install -d -m 0755 ${D}/data/trini
install -d -m 0700 ${D}/data/trini/.ssh

install -m 0600 ${WORKDIR}/authorized_keys ${D}/data/trini/.ssh/

# The new users and groups are created before the do_install
# step, so you are now free to make use of them:
chown -R trini ${D}/data/trini
chgrp -R trini ${D}/data/trini
}

FILES_${PN} = "/data/trini"

# Prevents do_package failures with:
# debugsources.list: No such file or directory:
INHIBIT_PACKAGE_DEBUG_SPLIT = "1"

Now, there’s one slight problem. I added myself with a user under /data which is excluded from Mender updates. The good thing is I get persistent history and so forth.  The bad thing is I’m not installed there yet.  So I either need to re-flash one last time or manually copy the files over from the filesystem image to the device before I reboot.  Finally, I need to enable myself to use sudo. In addition to adding sudo to IMAGE_INSTALL I also need to either tweak the sudo recipe so that /etc/sudoers.d/ is looked under, tweak it so that anyone in the wheel group can use sudo and add a wheel group, or borrow the example from meta/recipes-core/images/build-appliance-image_15.0.0.bb and do the following in core-image-minimal-router.bb:

# Take the example from recipes-core/images/build-appliance-image_15.0.0.bb
# on adding more sudoers
fakeroot do_populate_poky_src () {
    echo "trini ALL=(ALL) NOPASSWD: ALL" >> ${IMAGE_ROOTFS}/etc/sudoers
}
IMAGE_PREPROCESS_COMMAND += "do_populate_poky_src; "

With all of that built, deployed, and unit tested, it’s time to go live.  My SOHO router is done and ready for production.  It’s now on me to make sure this stays up to date, which in some ways is a lot better than the alternative.  With my previous router, I only had an non-volatile RAM dump specific to the model of router as a backup. I now have my complete configuration containing firewall rules, DHCP options, and more saved. Since starting on the project I have even braved a few OTA updates and had minimal downtime.

This concludes the walk through of building a SOHO router with OpenEmbedded. In the final part of this series, I will describe some of the lessons I learned while designing and implementing this project.

[Go to Part Four of the series.]