Balena: Running Containerized Applications on phyBOARD-AM62x
This article was prepared by Atanas Bunchev.
Balena.io, commonly known as Balena, is a platform simplifying IoT device deployment and management. It uses Docker containers for easy application deployment across various embedded Linux devices, offers centralized device management for monitoring and updates, and supports scalability from prototypes to large-scale projects. With over-the-air (OTA) updates and monitoring tools, Balena streamlines IoT application development and management. Balena supports over a 100 device types with robust and resilient remote updates, combined with a powerful toolset for monitoring, maintaining and debugging.
Recently PHYTEC took interest into having their AM62x-based development board added to the list of Balena-supported devices and Konsulko was on the task. The process of bringing Balena support for a new board consists of creating a custom Yocto-based Board Support Repository and having it pass an automated testing procedure run on the actual hardware.
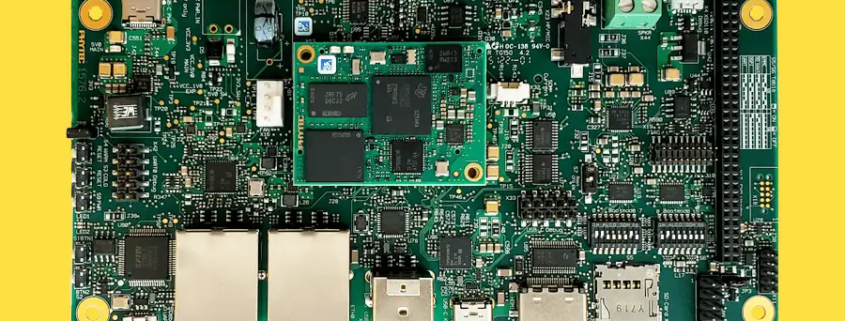
At the heart of the phyBOARD-AM62x is the industrial PHYTEC phyCORE-AM62x. This versatile System-on-Module (SoM) is powered by Texas Instruments AM62x Sitara processor and is equipped with Ethernet, CAN, UART, I2C, SPI, dual display, MIPI CSI-2 camera and audio. The phyBOARD-AM62x offers a modern FTDI interface allowing software download and debugging, perfect for development. Paired alongside the M.2 connectorized WiFi and Bluetooth module extensions makes a perfect product for IoT devices.
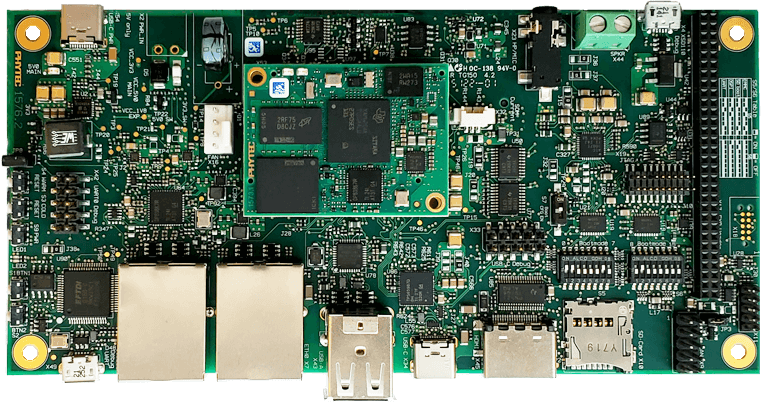
Konsulko engineers created balena-phytec git repository which is currently publicly available at the BalenaOS GitHub organization. It is based on the Yocto/OpenEmbedded board support package (BSP) layers meta-ti and meta-phytec. The repository provides all necessary modifications to run BalenaOS (Balena’s specific Linux distribution) on the phyBOARD-AM62x, including a new Yocto/OpenEmbedded integration layer meta-balena-phytec that extends the recipes for the U-Boot bootloader and Linux kernel.
Texas Instruments AM62x SoCs come with a RTI/WWDT Windowed Watchdog Timer which would turn off the board when not serviced within a specific time interval. RTI only supports a windowed mode, where the watchdog can only be petted during the open window; not too early or not too late. However, due to the nature of systemd utilized by BalenaOS, it is unable to ping the watchdog within the designated open window period, as it attempts to ping at watchdog_timeout/2 ticks. Therefore the systemd watchdog has been disabled by a BitBake append file for systemd in layer meta-balena-phytec.
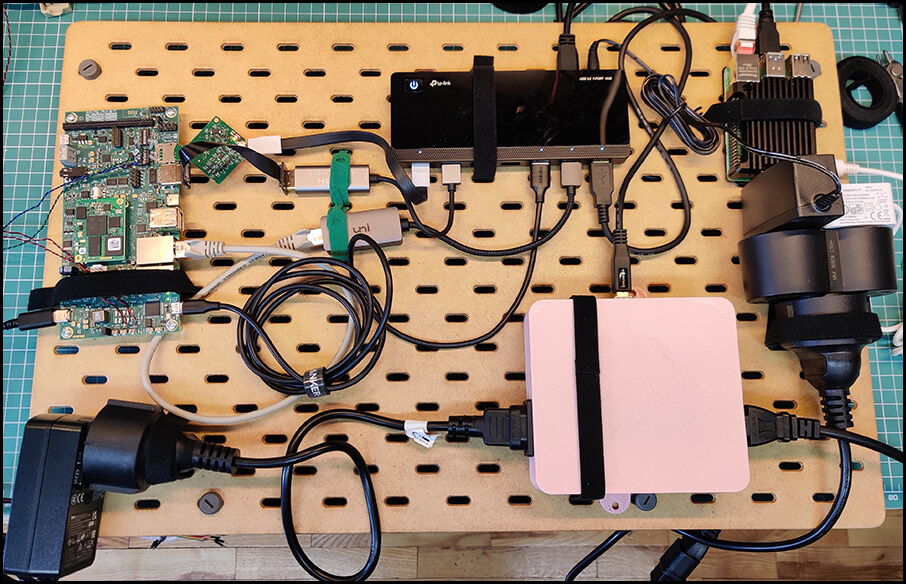
To finish the task Konsulko and Balena engineers ran a special test suite on the board using the Balena AutoKit. Shortened from Automation Kit, the AutoKit is a complete hardware solution for automated interaction with embedded Linux device. It features SD card multiplexing, Ethernet and power control, serial communication, HDMI capture and support for other USB peripherals.
The rest of the article covers a step-by-step guide for connecting the phyBOARD-AM62x to BalenaCloud and deploying a simple containerized application on it, as well as demonstration of some of the basic features provided by BalenaCloud’s Dashboard.
Downloading an Image
The first thing you have to do is to register at https://dashboard.balena-cloud.com/signup. Every user is allowed to have up to 10 devices with all features enabled for free. While the software that Balena develops is open source, the usage of their cloud infrastructure with more than 10 connected IoT devices requires a plan subscription, with better plans coming with more devices and better support response time.
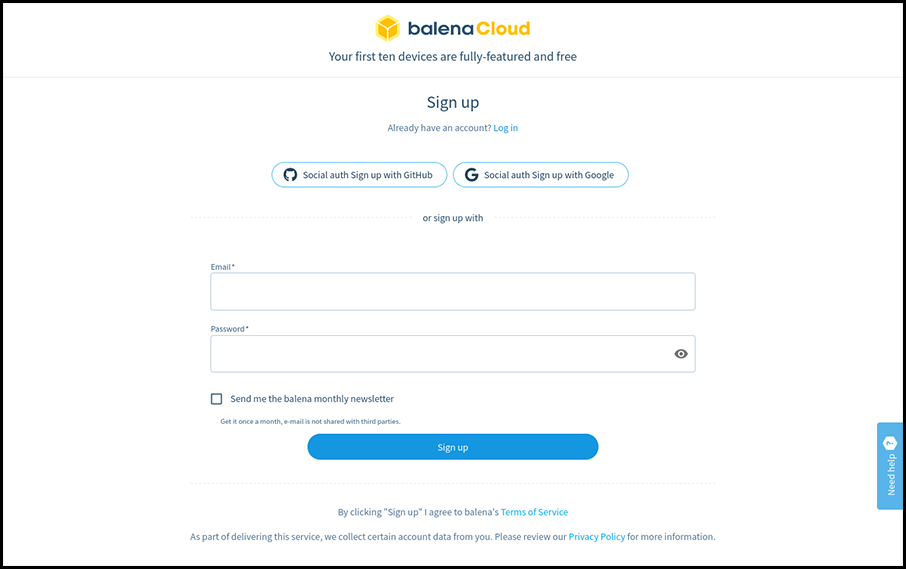
Once you register and confirm your e-mail you’ll be welcomed with a screen providing an introduction to Balena and inviting you to create a fleet.
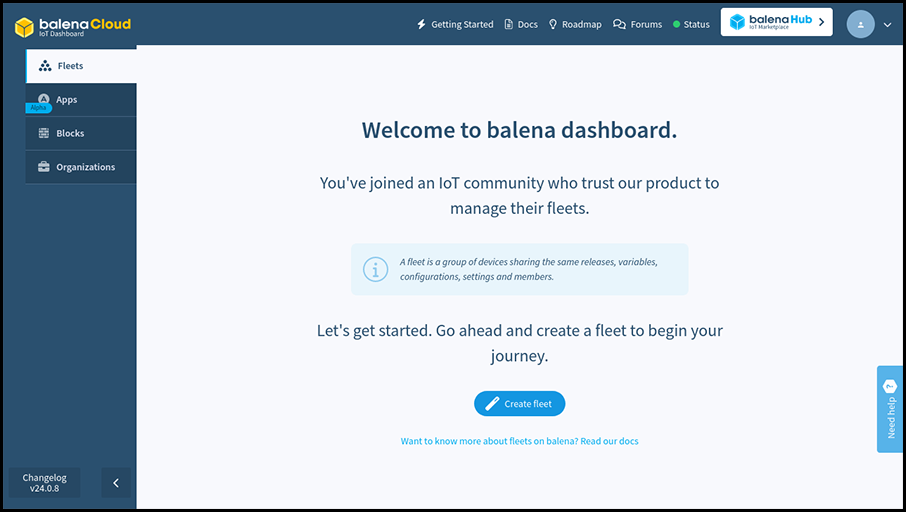
A fleet is a group of devices with identical configuration and with the same applications deployed on them. Create a new fleet and set the device type to phyBOARD-AM62x.
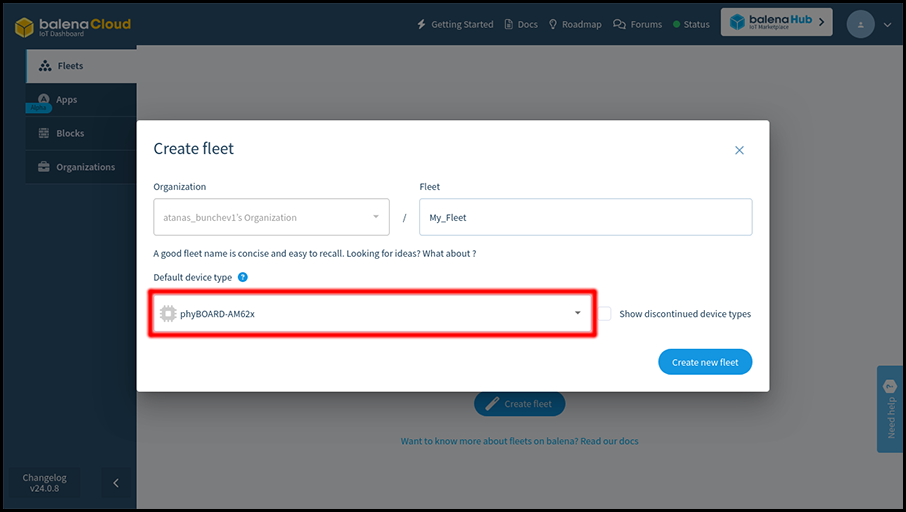
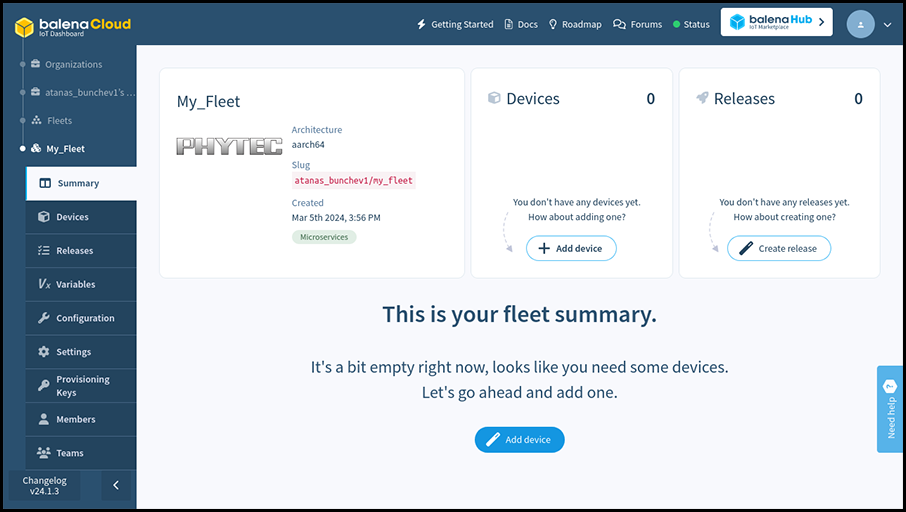
Once your fleet is created click the “Add device” button. Select the Development edition, as it includes a few quality of life modifications for developers, such as passwordless ssh access as root on port 22222.
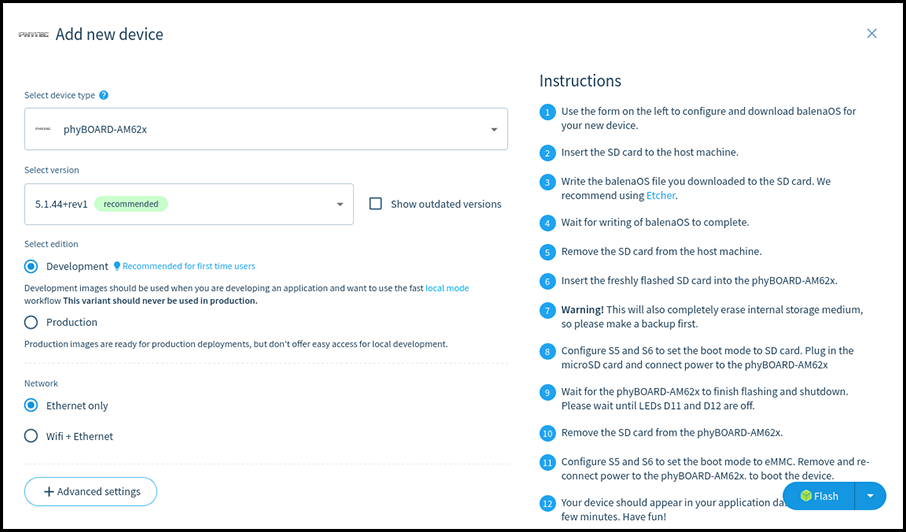
Once you have picked the configuration for the new image you can download it by selecting the Download balenaOS option from the menu next to the Flash button and pressing on that button after that.

Alternatively if you have balenaEtcher installed you can directly click on the Flash button. That way balenaEtcher will start up with the correct URL for the image already selected, leaving only the output device selection to you.
The third option – downloading a configuration file – is applicable when having a custom BalenaOS image that you want to configure for a given fleet.
Flashing the Installation media
Once the image is downloaded you need to flash it on a microSD card. There are several ways of flashing an image. One way is to use a graphical tool for the task, such as balenaEtcher or Rufus (keep in mind that some of these will expect you to unzip the image in advance).
Another way to do is to use the Linux shell. Replace <your_image>.img.zip with the compressed image you downloaded and <your_image>.img with the extracted file. Replace /dev/sdX with the path to the microSD card.
unzip <your_image>.img.zip
umount /dev/sdX*
dd if=<your_image>.img of=/dev/sdX bs=128k status=progress
sync
Keep in mind that flashing an image on a microSD card will delete all data stored on the microSD card.
Installing Balena on the phyBOARD-AM62x
Note: The following procedure will delete all data on the internal eMMC storage of your phyBOARD-AM62x.
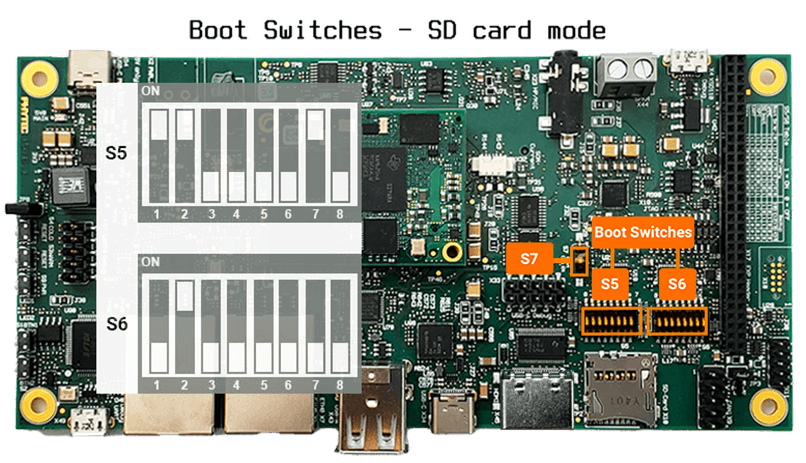
Plug in the newly-flashed microSD card into the phyBOARD-AM62x board. Make sure the boot switches are set to SD card mode. Power on the board and wait for the installation to the internal eMMC to finish.
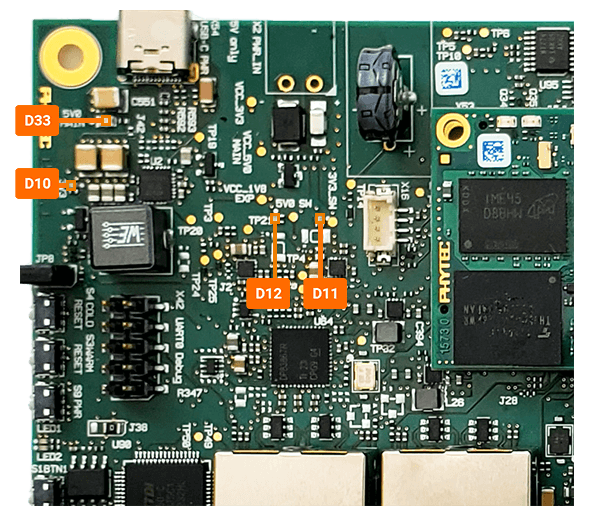
Once the installation is complete the board will turn off. This is indicated by LEDs D11 and D12 turning off.
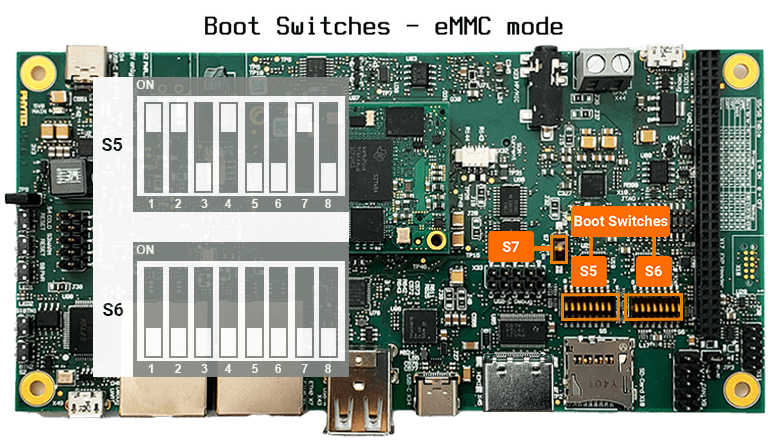
As the installation on the internal eMMC has finished, set the boot mode to eMMC. Disconnect the microSD card, connect phyBOARD-AM62x to Ethernet and power it on.
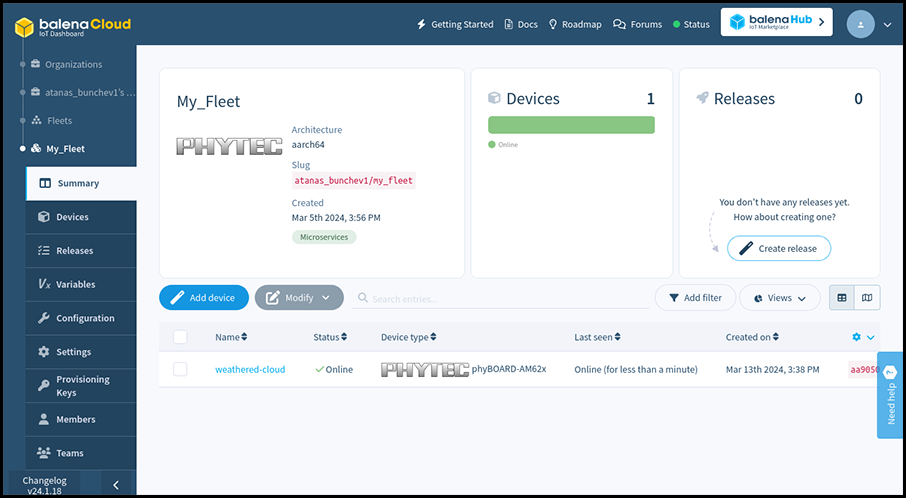
In few moments the board will show up on the fleet page at the Dashboard.
Clicking on phyBOARD-AM62x in the table will open a dedicated page for the board that shows details and current status information.
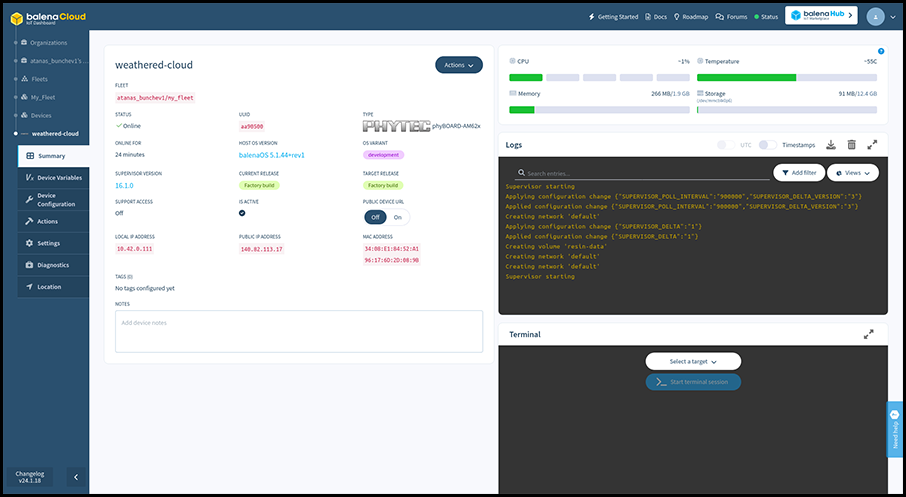
On the left you can see the fleet containing the phyBOARD-AM62x, its online status, its unique UUID, the Host OS and Balena Supervisor versions, the local and public IP address of the board. You can enable or disable the Public Device URL of the board, as well as use the Actions menu to manage the board.
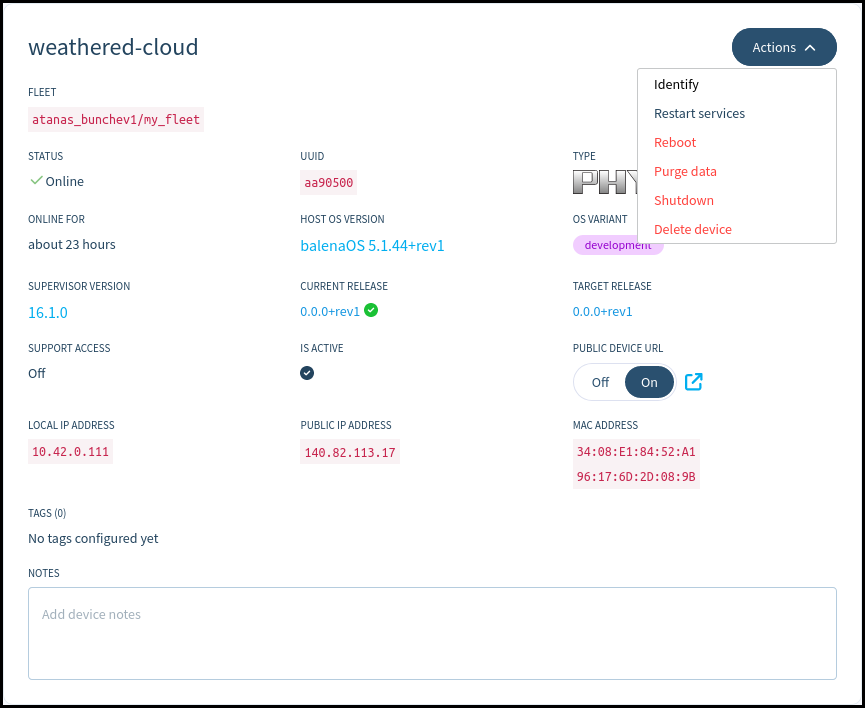
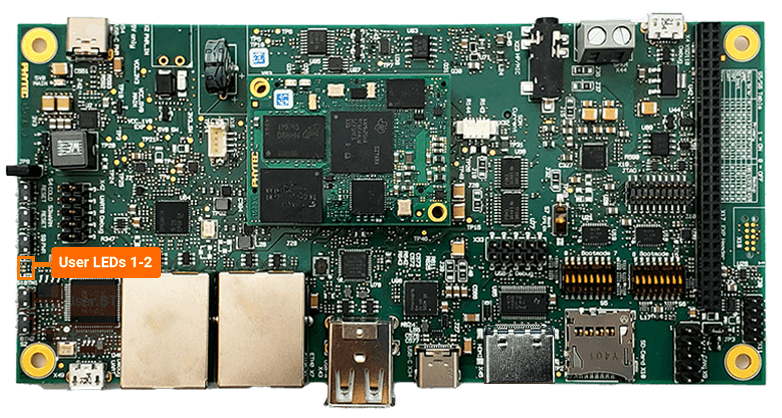
The Identify action will make a specific LED on phyBOARD-AM62x blink for half a minute to make identifying the exact board easier – a very useful feature when having a bunch of similar boards lying around. On phyBOARD-AM62x this is User LED 1, a bright red LED at the left edge of the carrier board.
At the upper-right corner you can see the current resource usage on the board, as well as the temperature and free persistent storage space.

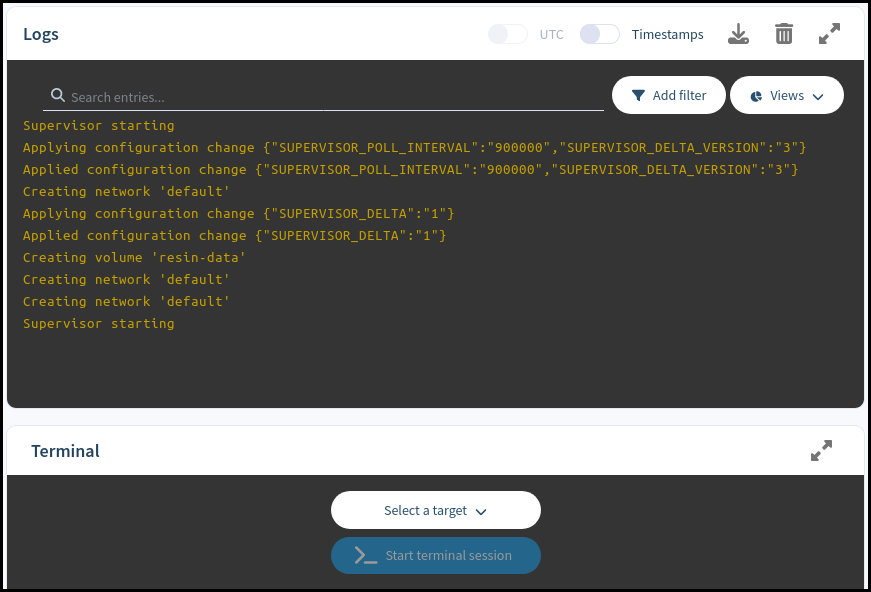
Below them are the Logs and Terminal sections, which can be used for advanced remote debugging and troubleshooting of the board.
Lastly, at the currently empty space at the bottom-left part of the screen we’ll be able to see the status of the containerized applications currently deployed on the board.
Pushing a hello-world application to phyBOARD-AM62x
The last section of this article contains a quick example of how to push a containerized application to a board that runs Balena. The example application that will be deployed is a Docker container consisting of a simple web page hosted with NodeJS Express.
Download Balena CLI tool, a Command Line Interface for balenaCloud or openBalena. Select the standalone binary for your workstation – the machine you’re going to use to deploy the application, not the board you’re going to deploy to.
As of the time of writing, the most recent version is balena-cli-v18.1.5-linux-x64-standalone.zip. If you are utilizing a newer release or a different operating system, kindly substitute the filename accordingly.
unzip balena-cli-v18.1.5-linux-x64-standalone.zip
cd balena-cli
You need to login in your profile from the CLI before you can push anything to your devices. For that task you can use the ./balena login command:
./balena login
 _            _
| |__   __ _ | |  ____  _ __    __ _
| '_ \ / _` || | / __ \| '_ \  / _` |
| |_) | (_) || ||  ___/| | | || (_) |
|_.__/ \__,_||_| \____/|_| |_| \__,_|


Logging in to balena-cloud.com
? How would you like to login? (Use arrow keys)
❯ Web authorization (recommended)
  Credentials
  Authentication token
  I don't have a balena account!
Press Enter to select Web authorization and confirm the authentication request on the web page that opens:

Alternatively, select the Credentials option and insert your username and password.
Once authentication is successful, clone the Hello World sample from https://github.com/balena-io-examples/balena-nodejs-hello-world and push it to your fleet. Replace <fleet name> with the actual name of the fleet that the phyBOARD-AM62x is part of.
git clone https://github.com/balena-io-examples/balena-nodejs-hello-world.git
cd balena-nodejs-hello-world
../balena push <fleet name>
Once the application is uploaded you can see it on the board’s page at the web dashboard.
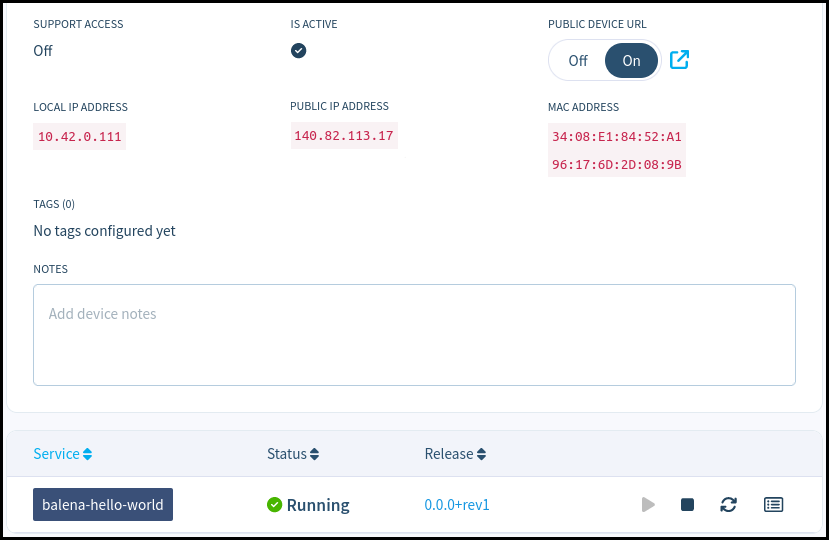
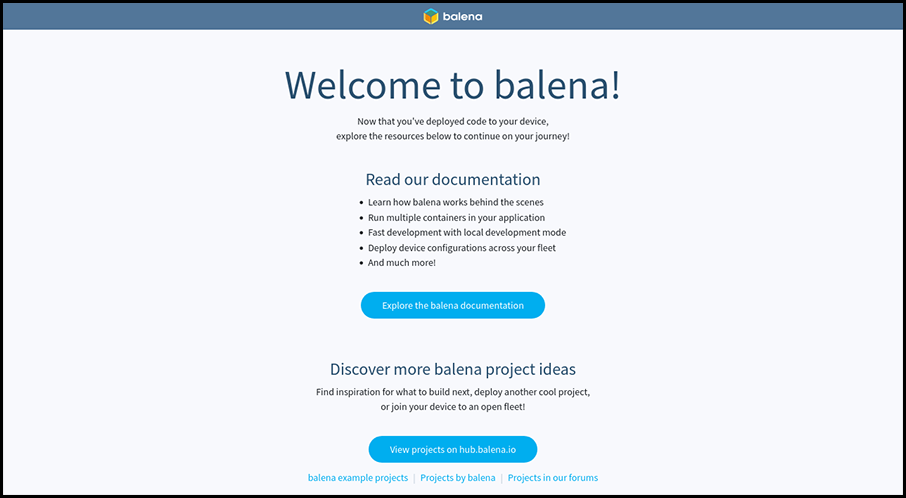
The Hello World example is a web server hosting a single web page. To check it out, you can either visit the board’s local IP address if you’re in the same local network as phyBOARD-AM62x, or enable the PUBLIC DEVICE URL and open the hyperlink that appears next to the switch once enabled.
This article demonstrates how to setup and use the PHYTEC phyBOARD-AM62x development board with Balena, a container-based distribution designed for easy and rapid development of embedded applications, packed with useful device management and troubleshooting features as well as sophisticated monitoring and automation-oriented ones. Get in touch with us to discuss additional features. Our team is ready to help in development of new or already existing Linux embedded projects.
About Konsulko Group
From the earliest days of OpenEmbedded and the Yocto Project, Konsulko engineers have actively contributed upstream and participated in the community, offering their expertise and guidance in developing high-quality commercial products. Our proficiency extends to Balena, RAUC, Mender, and other open-source solutions, ensuring seamless and reliable over-the-air updates. Contact us to explore how Konsulko engineers can contribute to the advancement of your embedded Linux product development.
___

