Building a Custom Linux Distro for NVIDIA CUDA-enabled Devices
The use of Tegra, the CUDA-enabled system on a chip (SoC) series developed by NVIDIA, is increasing in embedded Linux devices in various industries requiring deep learning and artificial intelligence solutions. For development purposes NVIDIA L4T and JetPack SDK provide a reference image derived from Ubuntu. However, reliable high-quality industrial devices require a custom embedded Linux distribution for the exact needs of their complex operations. The open source ecosystem provides various options for the user space of a device with embedded Linux. As a consultancy/professional services company, Konsulko Group has seen that some of our customers prefer systemd, others system V; some prefer Wayland display server protocol, others X11; some prefer vim, others emacs. The solution is to create customized embedded Linux distribution.
The Yocto Project and OpenEmbedded
In this article, we’ll discuss how to get started and build a minimal custom Linux distribution for embedded NVIDIA CUDA-enabled devices using the Yocto Project (YP) and OpenEmbedded (OE). As long time developers and users of the Yocto Project and OpenEmbedded, both have become favorite tools for creating customized distributions for Konsulko engineers. We frequently use and support them commercially, including for embedded devices with NVIDIA Tegra SoCs.
The Yocto Project is a Linux Foundation collaborative open source project for creating custom images for embedded devices. It is based on Poky, the reference distribution of the Yocto Project, using the OpenEmbedded build system. The Yocto Project releases on a 6-month cadence. As of the time of this writing, the latest two stable releases are Warrior (2.7) from April 2019 and Thud (2.6) from November 2018.
NVIDIA CUDA, Tegra and Jetson
CUDA is a parallel computing platform and programming model developed by NVIDIA that allows seamlessly to use GPU for general purpose computing. This makes the CUDA architecture not only appropriate for 3D graphics but also for a wide range of machine learning and artificial intelligence (AI) applications.
NVIDIA Jetson is a leading AI computing platform for GPU-accelerated parallel processing with CUDA on mobile and embedded devices. The NVIDIA Jetson portfolio, featuring Nano, TX2 and AGX Xavier, is bringing the power of modern AI to embedded systems with ARM CPUs for robotics and autonomous machines. All these Jetson models feature the Tegra ARM SoC. The examples in this article have been tested on NVIDIA Jetson TX2 developer kit.
| Jetson | CUDA | Available through |
|---|---|---|
| TK1 | 6.5 | Jan 2024 (for the CPU) / 2015 for Toradex Apalis TK1 |
| TX1 | 10 | Jan 2021 |
| TX2 | 10 | Apr 2022 |
| TX2i | 10 | April 2028 |
| Xavier | 10 | Jan 2025 |
| Nano | 10 | Jan 2025 |
It is important to consider the end of life and the supported CUDA version when selecting appropriate Jetson Tegra model for you embedded device. Visit developer.nvidia.com for more details regarding the lifecycle of any Jetson model. With extended life until 2028, TX2i is appropriate for industrial applications as it supports a wide range of operating temperature for -40°C (-40°F) to 85°C (185°F). TX2, the model that we are using in this article is compatible with TX2i.
Another important thing to consider is the supported CUDA version. For example, as shown in the compatibility matrix, TK1 doesn’t support latest CUDA version and will be available only through 2024. Therefore, it is not the best choice if you are starting a new product right now.
Putting the Pieces Together
Each CUDA version has requirements for compatible GCC and glibc versions. Unfortunately, the latest CUDA version often doesn’t support the latest GCC version. For example, CUDA 10 requires GCC version 7 although the latest available GCC is version 9.
On the other hand each release of the Yocto Project brings metadata with specific layers and recipes, including for a specific GCC version. Warrior, the latest release of the Yocto Project as of the moment, provides GCC 8.3 and 9.1 but dropped the support for GCC 7. Let’s have a look at the minimal supported version of GCC and G++ by recent releases on the Yocto Project.
| Yocto Project Release Codename | Yocto Project Release Version | Yocto Project Release Date | Minimal Supported GCC version |
|---|---|---|---|
| Warrior | 2.7 | April 2019 | 8.3 |
| Thud | 2.6 | November 2018 | 7.3 |
| Sumo | 2.5 | April 2018 | 7.3 |
| Rocko | 2.4 | October 2017 | 6.4 |
| Pyro | 2.3 | May 2017 | 5.4 |
| Morty | 2.2 | November 2016 | 5.4 |
| Krogoth | 2.1 | April 2016 | 4.9 |
| Jethro | 2 | November 2015 | 4.8 |
Now let’s compare the requirements of different CUDA versions for GCC and G++ with the information from the previous table about minimal supported version of GCC and G++ by recent releases on the Yocto Project.
| CUDA Version | Required GCC/G++ version | Latest Yocto/OE release with this GCC/G++ version |
|---|---|---|
| 10 | 7 | Thud (2.6) |
| 9 | 6 | Rocko (2.4) |
| 8 | 5 | Pyro (2.3) |
| 7 | 5 | Pyro (2.3) |
| 6.5 | 4.8 | Jethro (2) |
Obviously, out of the box, you cannot get CUDA 10 on Warrior, the latest Yocto release as of the moment, because of incompatible GCC version.
It is getting complicated, isn’t it? Don’t worry. Based on our experience, Konsulko Group can offer two turn-key solutions:
- Using the latest Yocto Project release with an external GCC toolchain compatible with the latest CUDA version
- Using the latest Yocto Project release providing the required GCC version by the latest CUDA version
My colleagues and I have successfully implemented both solutions for commercial projects. The first approach is more complicated as it requires an external GCC toolchain. The second approach is straight-forward, however for CUDA 10 it should use GCC 7 provided by Thud, the previous release of the Yocto Project.
Building a Linux Distribution for TX2 with GCC 7 and CUDA 10
This article takes the second approach and provides the exact steps to build a minimal image for NVIDIA Jetson TX2 developer kit based on the Yocto Project release Thud with GCC 7 and CUDA 10. The key ingredient is the Yocto/OE BSP layers meta-tegra which has been started by Matt Madison and is available at GitHub. This layer provides machine definitions for other Jeston units therefore the steps can be easily adjusted for any of the other devices supporting CUDA 10.
As active upstream contributors to various open source projects, we at Konsulko Group have made contributions to meta-tegra, including for the supporting CUDA 10 for Yocto release Thud.
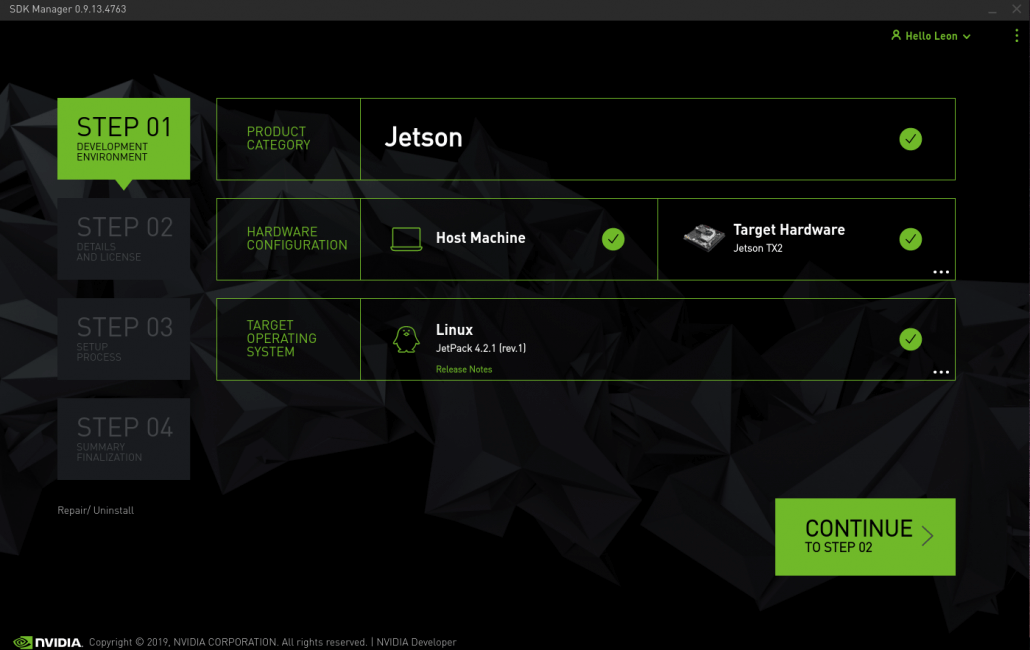
Before you start, install NVIDIA SDK Manager, run it and login to download JetPack packages for TX2. After that follow the steps below:
- Download Poky, the reference distribution of the Yocto Project
git clone -b thud git://git.yoctoproject.org/poky poky-tx2
- Download Yocto/OE BSP layer meta-tegra for NVIDIA Tegra:
cd poky-tx2/
git clone -b thud-l4t-r32.1 https://github.com/madisongh/meta-tegra.git
- Initialize the build environment:
source oe-init-build-env
- Edit conf/bblayers.conf and add meta-tegra to the list of included Yocto/OE layers.
- Append to the end of conf/local.conf the following content to set the machine to TX2, to set GCC to version 7 and CUDA to version 10 as well as to include cuda sample applications:
MACHINE = “jetson-tx2”
LICENSE_FLAGS_WHITELIST = “commercial”
IMAGE_CLASSES += “image_types_tegra”
IMAGE_FSTYPES = “tegraflash”
GCCVERSION = “7.%”
CUDA_VERSION=”10.0″
IMAGE_INSTALL_append = ” cuda-samples”
NVIDIA_DEVNET_MIRROR = “file:///home/leon/Downloads/nvidia/sdkm_downloads”
Note: Set the path to the downloaded JetPack packages in variable NVIDIA_DEVNET_MIRROR
- Build a minimal image
bitbake core-image-minimal
Building an image from scratch requires a lot of operations and takes some time so please patiently wait until bitbake completes all tasks.
Testing the Image
Flashing the Image
Follow the steps below to flash the image that we have just built on NVIDIA Jetson TX2:
- Plug micro-USB to USB cable to connect the build machine with NVIDIA Jetson TX2
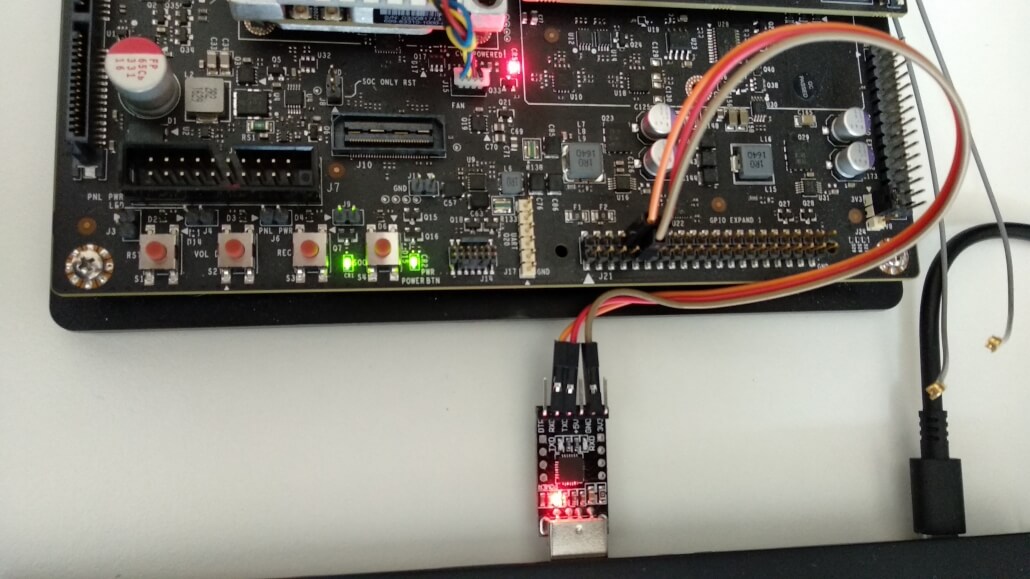
- Attach USB to UART debug cable to J21 GPIO header of NVIDIA Jetson TX2 and open a communication terminal to the dev kit, for example with screen:
sudo screen /dev/ttyUSB0 115200
- Power on Nvidia Jetson TX2 by and enter recovery mode by one of the following options:
- Interrupt u-boot and execute:
enterrcm
- Alternatively, hold the recovery button (REC) and press reset (RST) to enter recovery mode
- Extract tmp/deploy/images/jetson-tx2/ core-image-minimal-jetson-tx2.tegraflash.zip to an appropriate location, for example in a random temporary dir:
tx2dir=$(mktemp -u /tmp/tx2.XXXXXXXX)
unzip tmp/deploy/images/jetson-tx2/core-image-openbox-jetson-tx2.tegraflash.zip -d $tx2dir
- On the build machine enter the directory of the extracted zip and execute the script to flash the image:
cd $tx2dir
sudo ./doflash.sh
Note: after completing successfully the flashing, to save space on your build machine, you can delete the temporary directory.
Testing CUDA
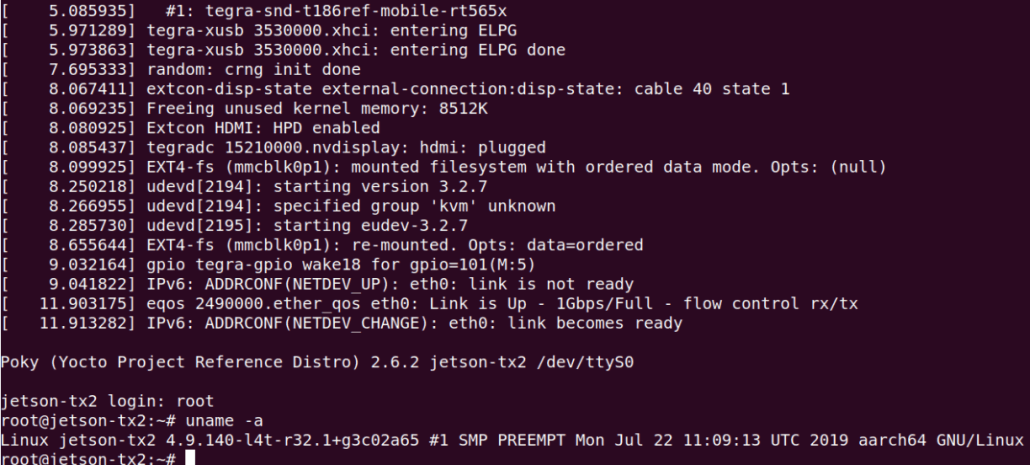
After our custom Linux distribution boots on NVIDIA Jetson TX2 login as root.
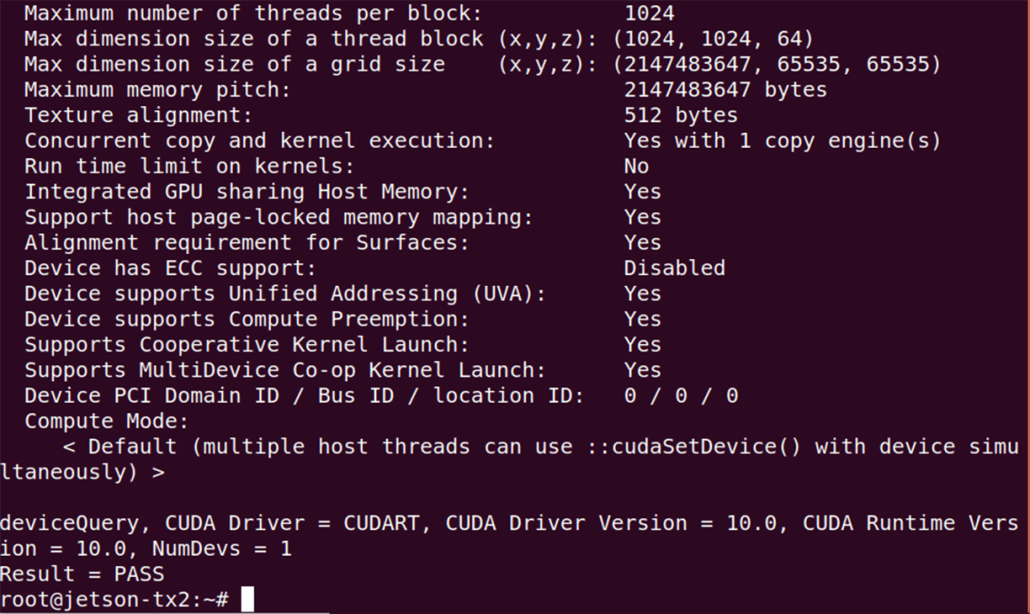
Run /usr/bin/cuda-samples/deviceQuery and if everything works as expected it will print Result = PASS on the screen.
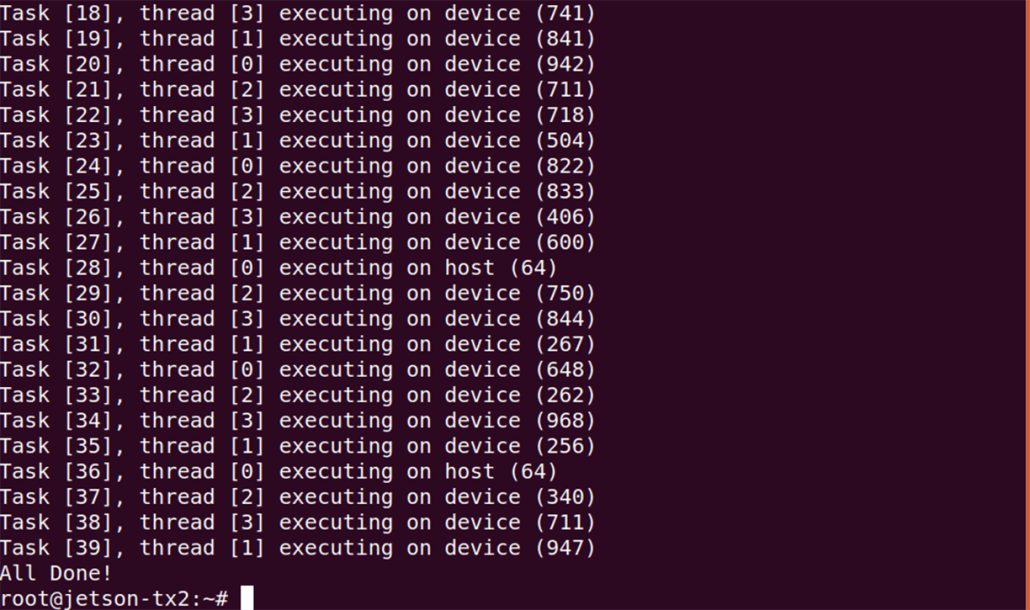
Finally, run the other sample application /usr/bin/cuda-samples/UnifiedMemoryStreams
Conclusions
The reference image derived from Ubuntu and provided as part of L4T is often not a good choice for high-quality and reliable industrial devices with NVIDIA Tegra SoC. Yocto project and OpenEmbedded provide all required tools to build highly customizable Linux distribution for the exact needs of your embedded devices. Supporting the latest CUDA version with the GCC versions provided by the recent releases of the Yocto project could be a challenge.

 © 2019. All Rights Reserved