Getting Started with RAUC on Raspberry Pi
RAUC is a secure, robust and flexible open source software for A/B updates of Embedded Linux devices. It is appropriate for various use cases and it is compatible with all popular build systems: The Yocto Project/ OpenEmbedded, Buildroot and PTXdist.
Konsulko Group engineers have experience with all popular open source solutions for software over the air updates of embedded Linux devices, including Mender, SWUPdate, HERE OTA Connect based on OSTree and Aktualizr. In this article we will discuss the exact steps to integrate RAUC with the Yocto Project (YP) and OpenEmbedded (OE) for Raspberry Pi – the most popular single board computer among students, hobbyists and makers.
For the practical example in this article we will be using the latest and greatest Raspberry Pi as of the moment: Raspberry Pi 4 Model B. Versions with different RAM sizes are available on the market. Any of these Raspberry Pi 4 Model B versions are OK for this RAUC demonstration.

As long time developers and users of the Yocto Project and OpenEmbedded, both have become favorite tools for creating customized distributions for Konsulko engineers. We frequently use and support them commercially. The Yocto Project is a Linux Foundation collaborative open source project for creating custom Linux distributions for embedded devices. It is based on Poky, the reference distribution of the Yocto Project, using the OpenEmbedded build system. The Yocto Project releases on a 6-month cadence. As of the time of this writing, the latest stable release is Dunfell (3.1).
RAUC is a powerful and flexible open source solution that requires advanced skills for initial integration. To use RAUC in an image for Raspberry Pi built with the Yocto Project and OpenEmbedded, it requires:
- U-Boot as a bootloader
- Enabled SquashFS in the Linux kernel configurations
- ext4 root file system
- Specific partitioning of the microSD card that matches the RAUC slots
- U-Boot environment configurations and a script to properly switch RAUC slots
- Certificate and a keyring to RAUC’s system.conf
RAUC is capable of covering various use cases and scenarios, including advanced options for single or redundant data partitions. Upgrades are performed through the so called RAUC bundles. It is possible to install them over the air or using the old-fashioned method with a USB stick. For managing updates to a fleet of Internet of Things, it is possible to integrate RAUC with Eclipse hawkBit project that acts as a deployment server with a nice web user interface.
For the sake of simplicity, this article focuses on the most simple and straight-forward use case with 2 identical RAUC slots: A and B. For each slot we will have a separate partition on the microSD card for Raspberry Pi. We have already covered most of the RAUC requirements in an additional Yocto/OE layer called meta-rauc-raspberrypi. We will use it to put the pieces together. First we will build a minimal bootable image for Raspberry Pi 4 with RAUC. We will flash it to both A and B slots. After that we will build a RAUC bundle that adds the text editor nano. Finally we will install this RAUC bundle on the B slot, reboot and verify that nano is present.
Building a Linux Distribution with RAUC
Follow the steps below to build a minimal image for Raspberry Pi with Yocto, OpenEmbedded and RAUC as well as to perform a software update:
- Download Poky, the reference distribution of the Yocto Project:
git clone -b dunfell git://git.yoctoproject.org/poky poky-rpi-rauc
cd poky-rpi-rauc
- Download meta-openembedded layer:
git clone -b dunfell git://git.openembedded.org/meta-openembedded
- Download Yocto/OE BSP layer meta-raspberrypi:
git clone -b dunfell git://git.yoctoproject.org/meta-raspberrypi
- Download Yocto/OE layers for RAUC:
git clone -b dunfell https://github.com/rauc/meta-rauc.git

git clone -b dunfell https://github.com/leon-anavi/meta-rauc-community.git
- Initialize the build environment:
source oe-init-build-env
- Add layers to conf/bblayers.conf:
bitbake-layers add-layer ../meta-openembedded/meta-oe/
bitbake-layers add-layer ../meta-openembedded/meta-python/
bitbake-layers add-layer ../meta-openembedded/meta-networking/
bitbake-layers add-layer ../meta-openembedded/meta-multimedia/
bitbake-layers add-layer ../meta-raspberrypi/
bitbake-layers add-layer ../meta-rauc
bitbake-layers add-layer ../meta-rauc-community/meta-rauc-raspberrypi/
- Adjust conf/local.conf for Raspberry Pi 4 with systemd and RAUC by adding the following configurations to the end of the file:
MACHINE = "raspberrypi4"

DISTRO_FEATURES_append = " systemd"
VIRTUAL-RUNTIME_init_manager = "systemd"
DISTRO_FEATURES_BACKFILL_CONSIDERED = "sysvinit"
VIRTUAL-RUNTIME_initscripts = ""

IMAGE_INSTALL_append = " rauc"

IMAGE_FSTYPES="tar.bz2 ext4 wic.bz2 wic.bmap"
SDIMG_ROOTFS_TYPE="ext4"
ENABLE_UART = "1"
RPI_USE_U_BOOT = "1"
PREFERRED_PROVIDER_virtual/bootloader = "u-boot"

WKS_FILE = "sdimage-dual-raspberrypi.wks.in"
-
Build a minimal bootable image:
bitbake core-image-minimal
NOTE: Building an image from scratch requires a lot of operations and takes some time so please patiently wait until bitbake completes all tasks.
- Flash the image to a microSD card and boot it on Raspberry Pi 4:
sudo umount /dev/sdX*
bzcat tmp/deploy/images/raspberrypi4/core-image-minimal-raspberrypi4.wic.bz2 | sudo dd of=/dev/sdX
sync
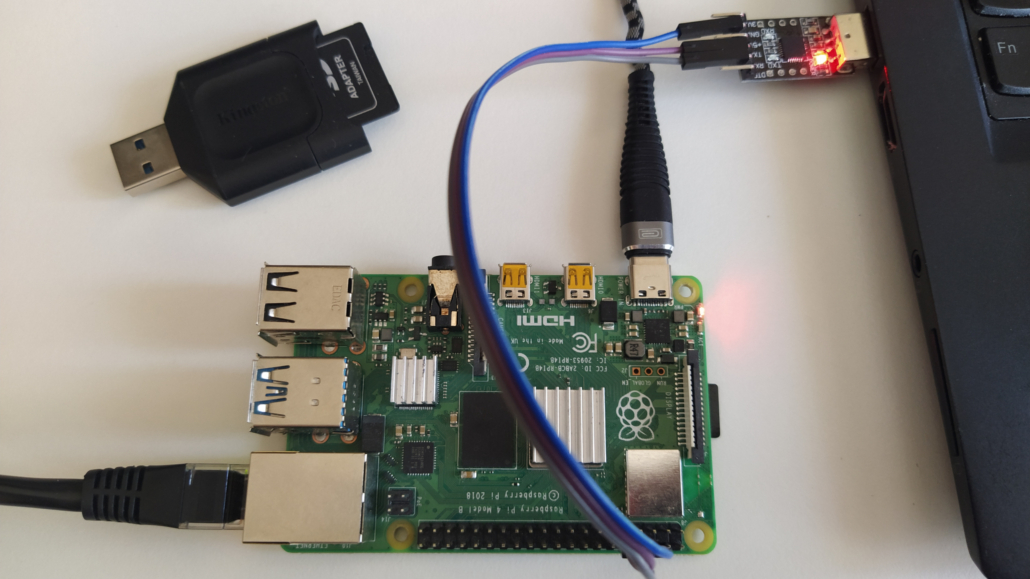
- Attach USB to UART debug cable to Raspberry Pi 4, plug ethernet cable and the microSD card. Turn on Raspberry Pi 4. Verify that the system boots successfully.
- Now, let’s extend the image with the simple text editor nano by adding the following line to the end of conf/local.conf:
IMAGE_INSTALL_append = " nano"
- Build a RAUC bundle:
bitbake update-bundle
- Start a web server:
cd tmp/deploy/images/raspberrypi4/
python3 -m http.server
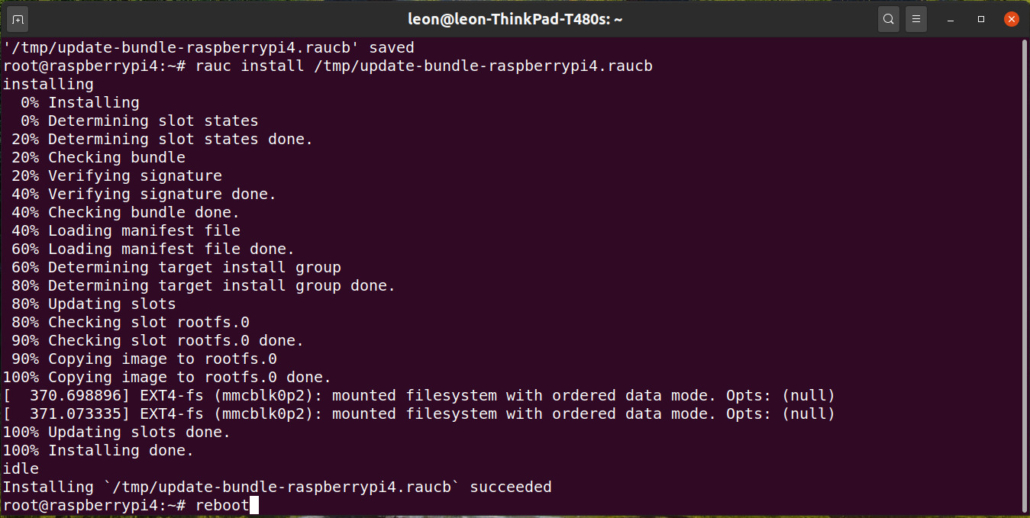
- On the Raspberry Pi download the RAUC bundle, install it and reboot the board:
wget http://192.168.1.2:8000/update-bundle-raspberrypi4.raucb -P /tmp
rauc install /tmp/update-bundle-raspberrypi4.raucb
reboot

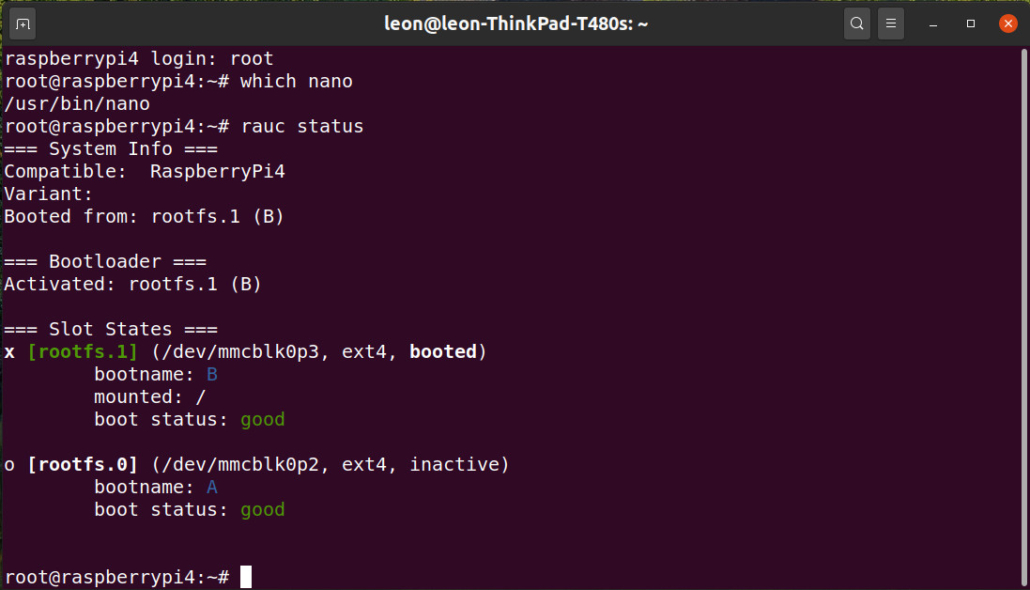
- After successful upgrade with RAUC reboot the Raspberry Pi and verify that nano is now present:
which nano
- Check RAUC status to confirm that now the second partition has been booted:
rauc status

For Internet of Things and other real-world products, the whole build procedure with the Yocto Project and OpenEmbedded can be optimized further to just a few commands for easy implementation of continuous integration (CI).
Konsulko engineers have been there since the earliest days of the OpenEmbedded build framework and the Yocto Project. We have experience with RAUC and various other open source solutions for software updates. Please contact us if you need your “own” rock-solid Linux distro for your own embedded product.


Worked great!
Any suggestions for how to modify https://github.com/leon-anavi/meta-rauc-community to suit? Looks like new keys are a must.
Thank you for the feedback!
Yes, absolutely new keys are a must. I recommend to create a new Yocto/OpenEmbedded layer that extends meta-rauc-community with specific for your use case bbappend and bb files.